 Radbin
Three of the eight are small and free, and you'll want them today: tool menus that open on hover, your own placeholder text, and Quick Compare. Two more are free and really useful: Denoise now works on any photo, JPEGs included, and Camera Raw's Remove Blemishes finds the spots on a face by itself. The other three cost generative credits: Generative Upscale, Relight and Remove related elements.
For five of them I also show how I'd do the same job in Radbin, the AI plugin for Photoshop I make. Full disclosure: Radbin is mine, so I put both results side by side and you can judge them yourself.
The whole test on YouTube, 22 minutes. Each section below links to its moment in the video.
Want it as a PDF? The same eight changes, every step and every before and after, in a free 15-page guide. Send me the PDF.
Photoshop 2027 at a glance
| Change | Where | Cost in Photoshop | Another way |
|---|---|---|---|
| 1. A new look | Everywhere | Free | Nothing needed |
| 2. Generative Upscale | Image › Generative Upscale | 10 or 20 credits | Ultra, 1 to 4 credits |
| 3. Placeholder text | Settings › Type | Free | Nothing needed |
| 4. Relight | Layer › New Relight Layer | 30 credits | Lightsmith, 2 credits |
| 5. Remove related elements | Remove tool, options bar | 10 to 20 credits | Seedream 5.5, 3 credits |
| 6. Denoise for any photo | Camera Raw Filter › Detail | Free | Seedream 5.5, only if needed |
| 7. Quick Compare | Bottom left | Free | Nothing needed |
| 8. Remove Blemishes | Camera Raw Filter › Remove | Free | Cherry, from 3 credits |
Photoshop's costs are Adobe generative credits from your Creative Cloud plan: the numbers Photoshop showed me. Radbin's are Radbin credits; plans start at $9.97 a month for 200.
1. A new look, and tool menus that open on hover
The first thing you'll notice: every open document sits in a tab with rounded corners. The change you'll feel is in the toolbar. Rest the pointer on a tool and its group opens by itself, with no click and no long press. It saves a click every time you reach for a tool inside a group. Watch (0:00)
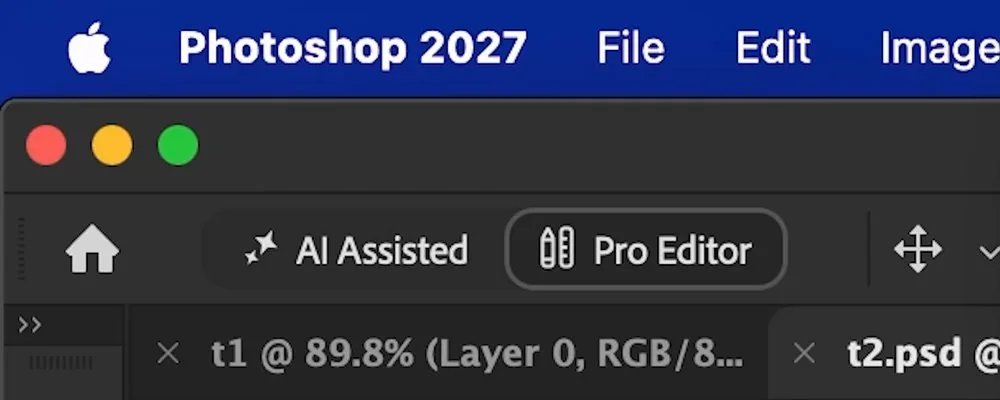
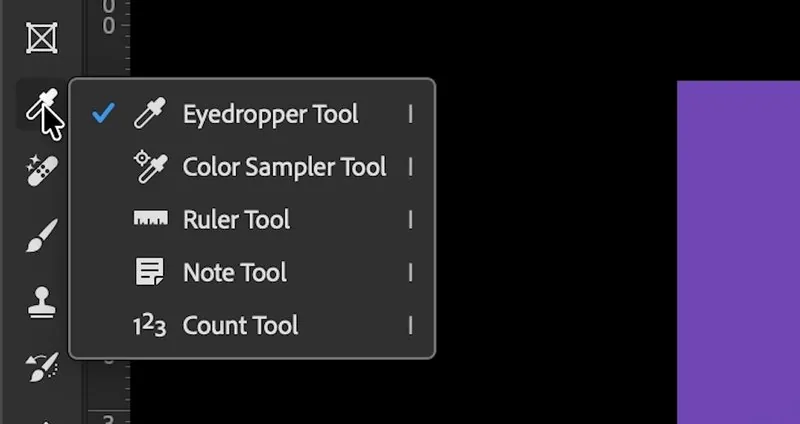
At the top left of the options bar sits a switch between AI Assisted and Pro Editor. The AI Assisted Editor, where you describe an edit in words, arrived in the summer's 27.10 update; Pro Editor is the Photoshop you know. Cost: free.
2. Generative Upscale, with Firefly Upscaler 2
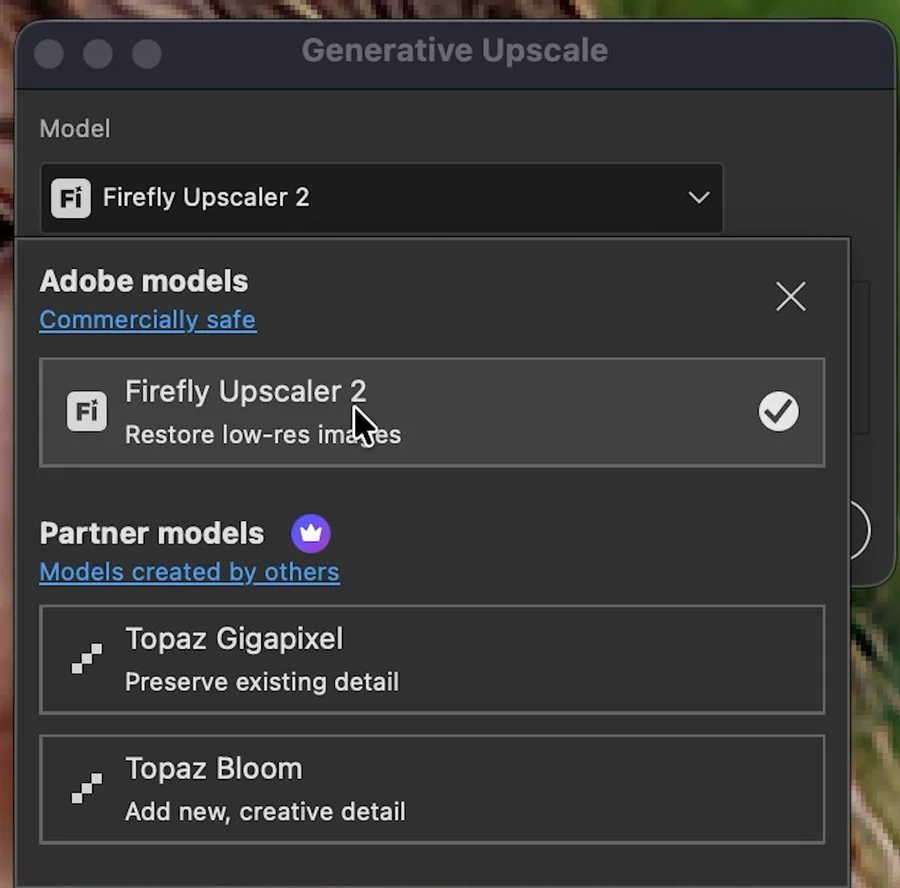
Generative Upscale has a new model, Firefly Upscaler 2, and two partner models from Topaz. Adobe describes Topaz Gigapixel as "preserve existing detail" and Topaz Bloom as "add new, creative detail". It enlarges 2× or 4× and opens the result as a new document. Watch (0:38)
- Open the photo. Mine was a small portrait, 450 × 500 pixels.
- Choose Image › Generative Upscale.
- Pick the model, then the scale: 2× or 4×.
- Click Upscale. The result opens as a new file.
Cost: 10 generative credits for images up to 25 megapixels, 20 up to 67.
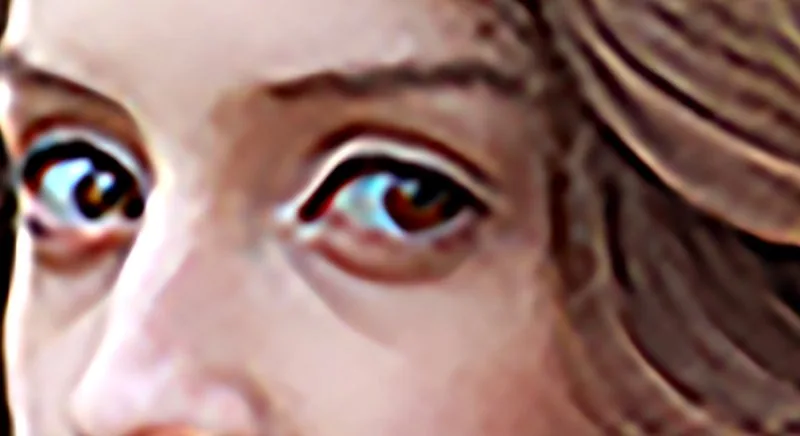
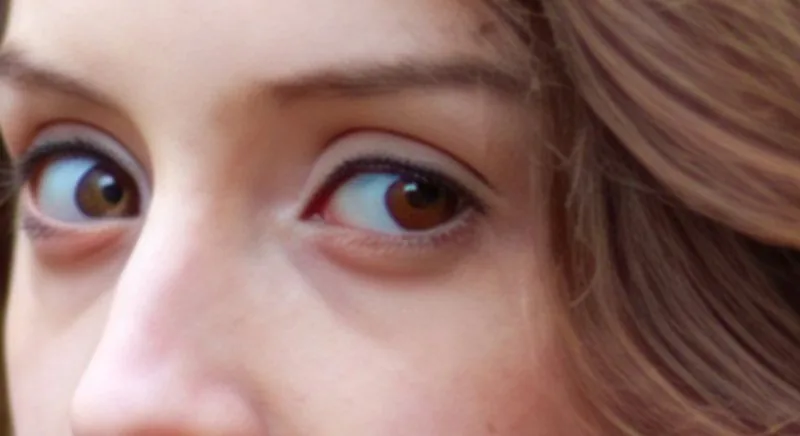
Firefly added real detail, but look at the pupils: they came out misshapen. Before you use it on a client's photo, check the eyes and the fine hair at 100%.
Another way: I ran the same portrait through the three upscalers in Radbin. Pruna kept more detail than Firefly, and Ultra, the newest, fixed the pupils and kept the skin and the hair sharp, for 1 to 4 credits. Watch the comparison (1:53)
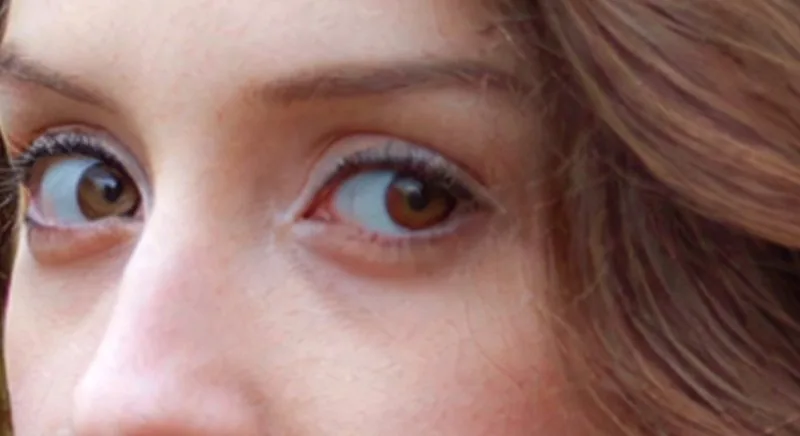
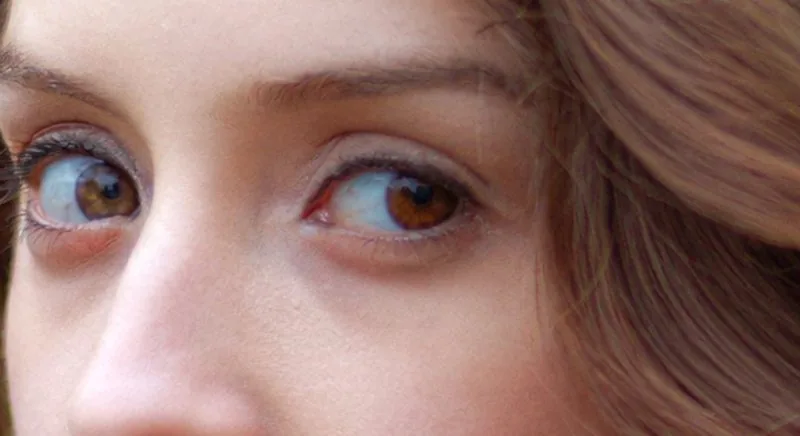
Every way to upscale side by side, Image Size and Super Resolution included: how to upscale an image in Photoshop.
3. Your own placeholder text
Every new text layer starts with placeholder words. Now you choose them, one for point text and one for paragraph text, in any language. Watch (3:31)
- On a Mac choose Photoshop › Settings › Type; on Windows, Edit › Preferences › Type.
- Under Placeholder Text, type what new point text should say, then what new paragraph text should say.
- Click OK. The next text layer you make starts with your words.
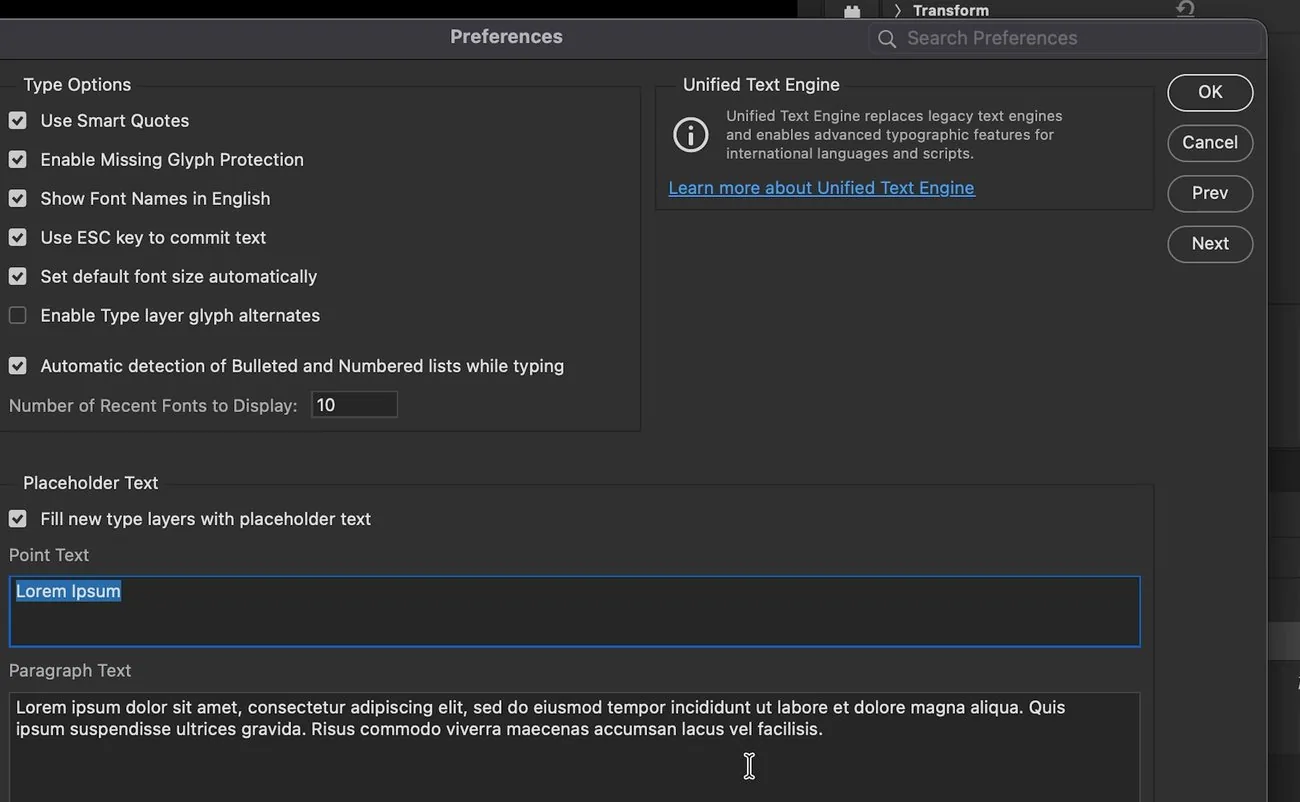
I typed my name. To get "Lorem ipsum" back, clear the box and click OK. Cost: free.
4. Relight is out of beta
Relight spent months in the Photoshop beta. In Photoshop 2027 it's in the regular app: Photoshop reads the light in your photo, then gives you a light to drag around the scene. Watch (4:20)
- Choose Layer › New Relight Layer. Photoshop analyses the photo.
- Drag the light. In Properties (Window › Properties), move it left or right, up or down, closer or further away.
- Set its intensity, its diffusion (softness) and its colour. Lower the original lighting to see only your light.
- Click Add light for another. Adobe allows up to three new lights.
- Click the check mark. Photoshop renders the full-size result as one layer.
Cost: 30 generative credits per Relight, and it runs online.
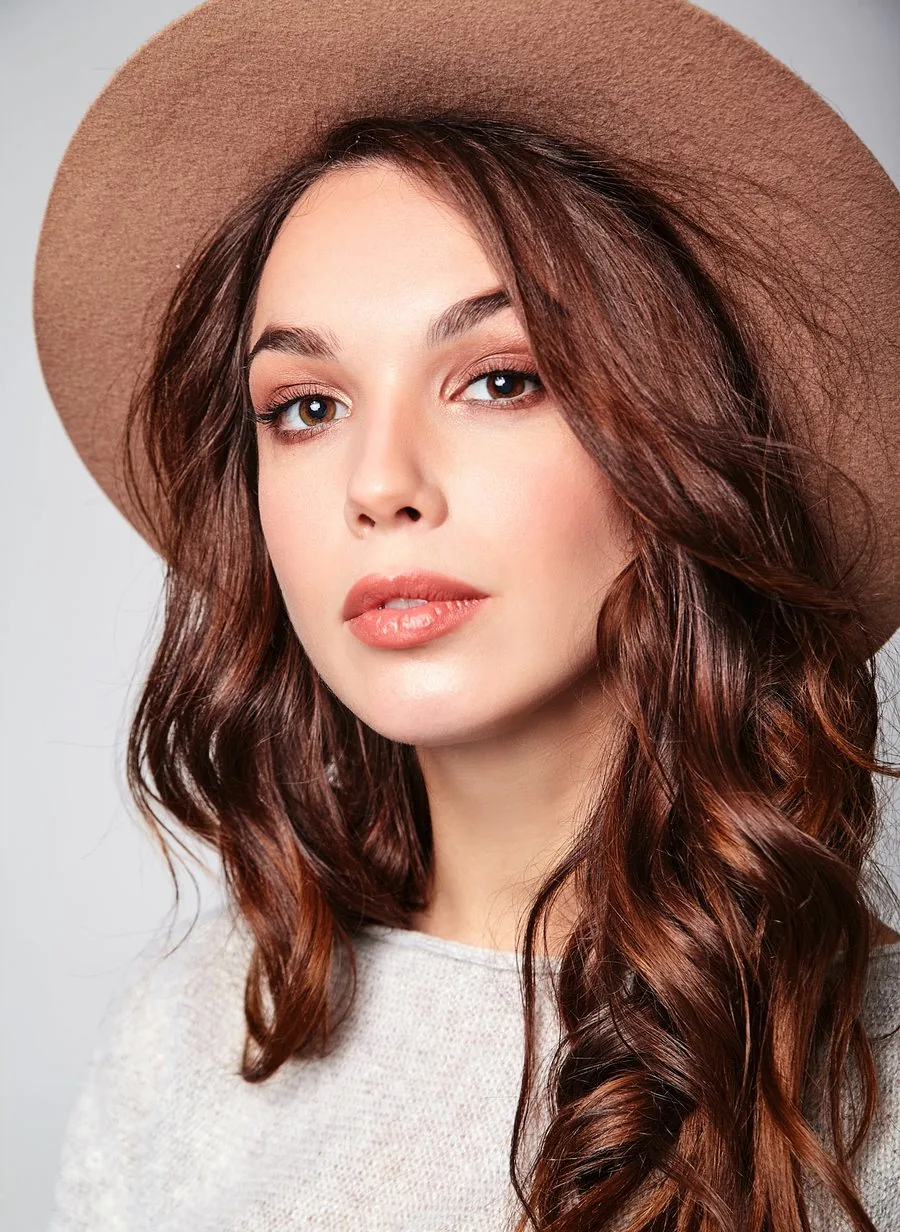
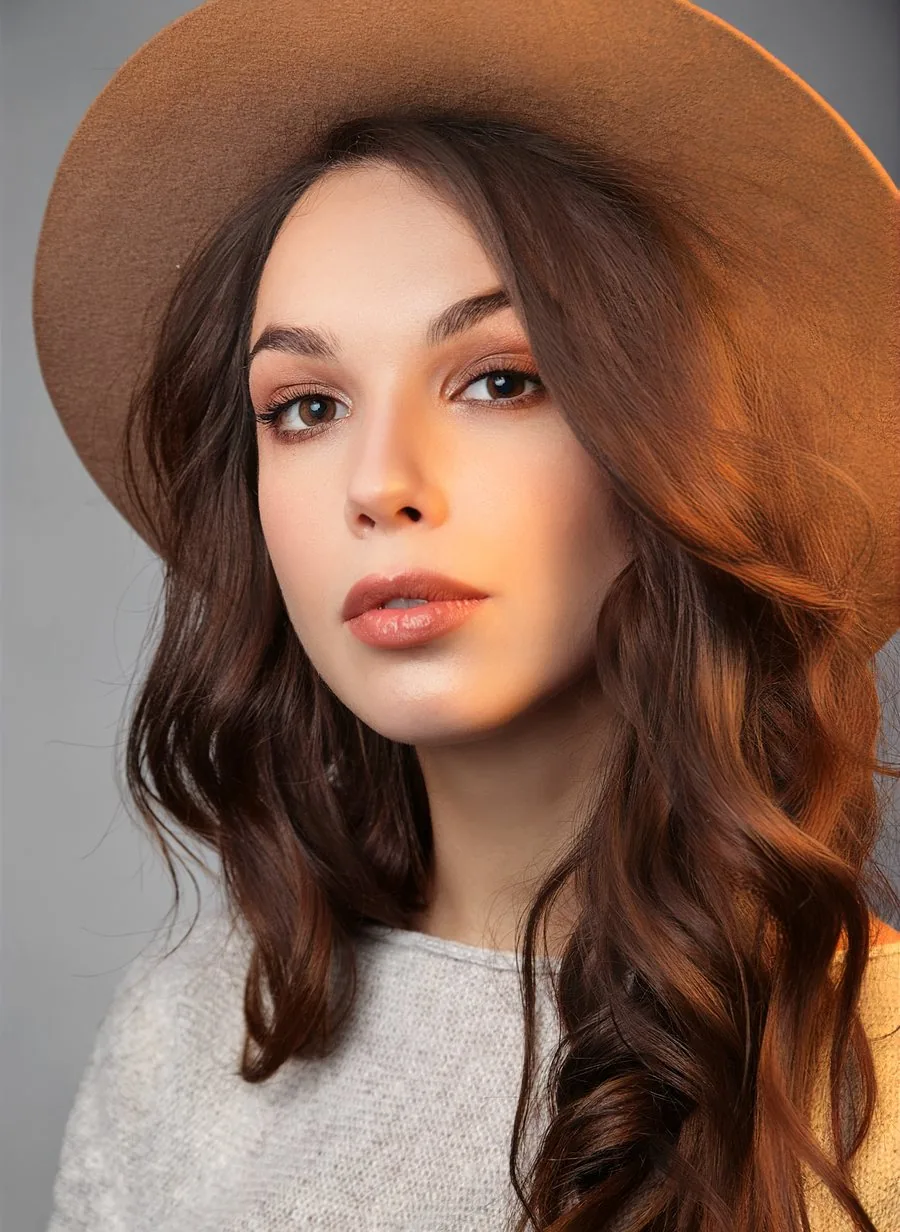
Three things slowed me down. Every change took about 2 to 6 seconds to show, so I waited between moves. The result is one layer, so you can't fix one light without the others. And fine hair suffered: in my portrait, the detailed hair lost its strands.
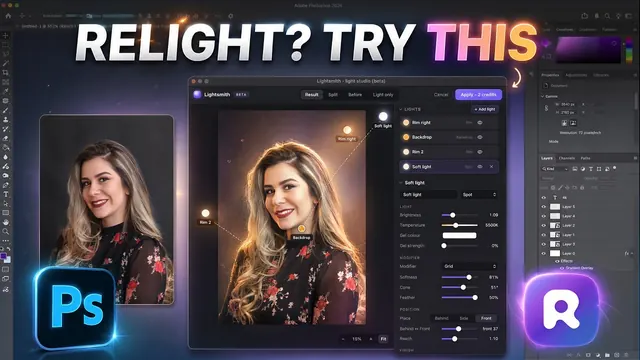
Another way: Lightsmith, the light studio in Radbin, reads the photo once and then computes the light on your own computer, so the lights move live while you drag them. It has 25 setups for portraits, from Rembrandt to film noir, and it can put every light on its own layer. Trying lights is free; a result costs 2 credits. Watch (7:04)
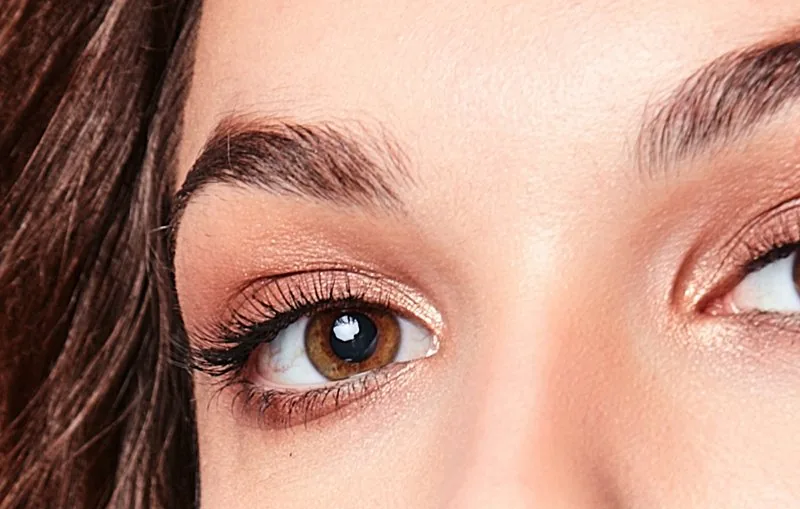
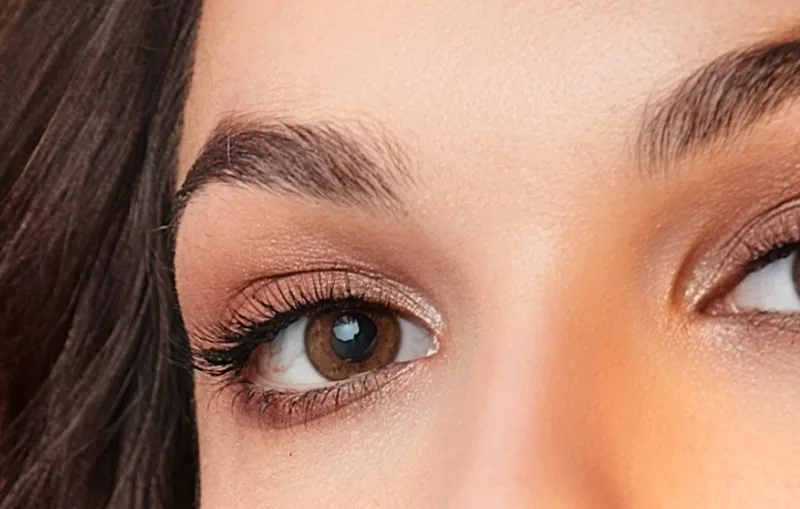
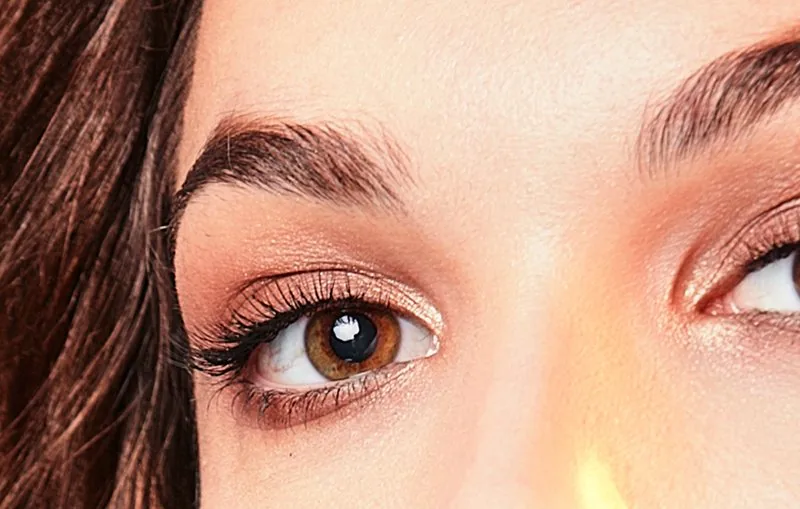
Up close, Photoshop's Relight softened the lashes and the skin and changed the light in the eyes. Lightsmith kept the original detail and added only light. The whole comparison: Photoshop Relight vs Lightsmith.
5. Remove related elements
The Remove tool can now take an object out together with what it leaves behind. Adobe lists shadows, reflections, smoke, steam, water ripples and footprints. Watch (10:47)
- Choose the Remove tool, in the Healing Brush group.
- In the options bar, turn on Remove related elements.
- Draw around the object. A few seconds later it's gone, and so is its reflection.
Cost: Adobe lists 10 generative credits; on my files Photoshop asked for 10 to 20, by the size of the photo.
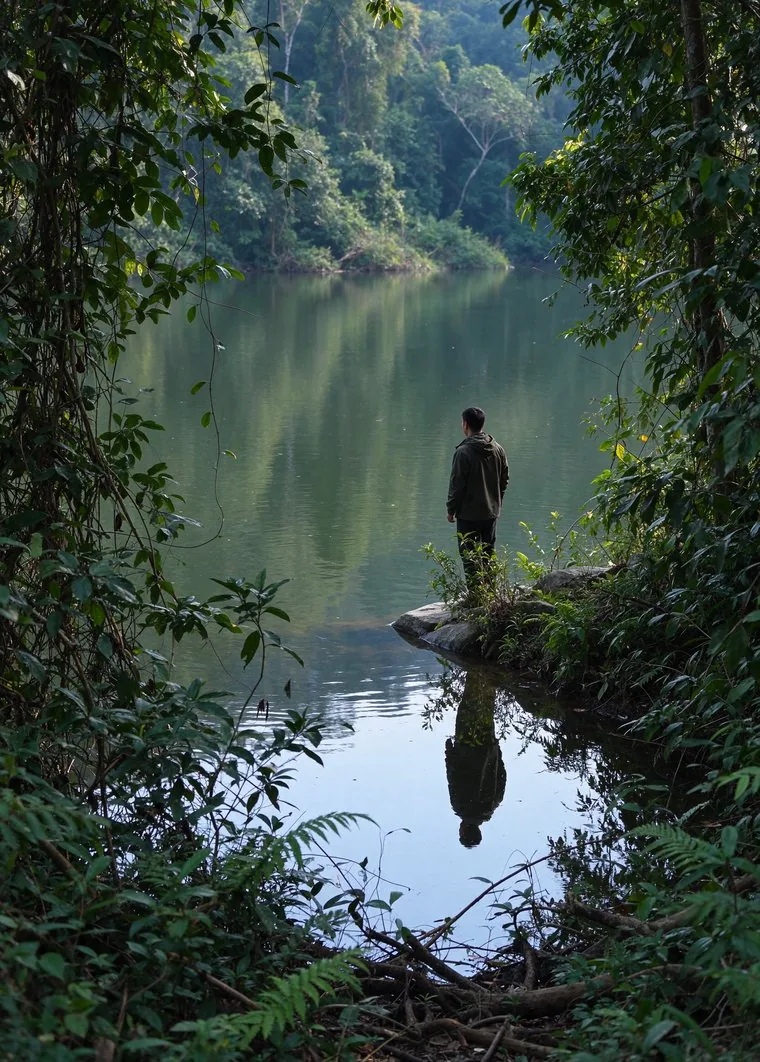
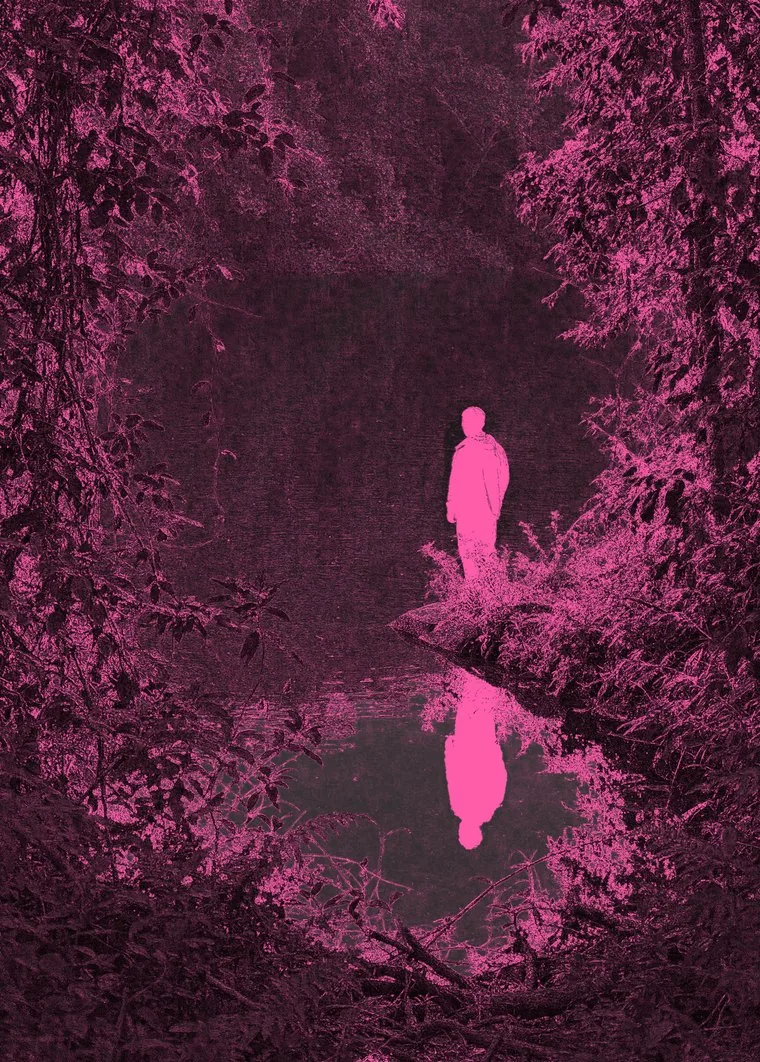
It found the reflection by itself, which is clever. But it also changed parts of the photo I never touched: I compared the two layers pixel by pixel, and 36% of the photo changed by more than a trace. On a face, that's a real problem. The fix takes three moves: add a layer mask to the result and fill it with black, take a white brush at 100% opacity, and paint back only the object and its reflection.
Another way: Seedream 5.5 on Radbin's Create tab. Draw a square selection around the man, type remove the person with his reflection in water, and the result comes back in about 20 to 25 seconds as a new layer, for 3 credits. It changed nothing outside my square. Watch (12:55)
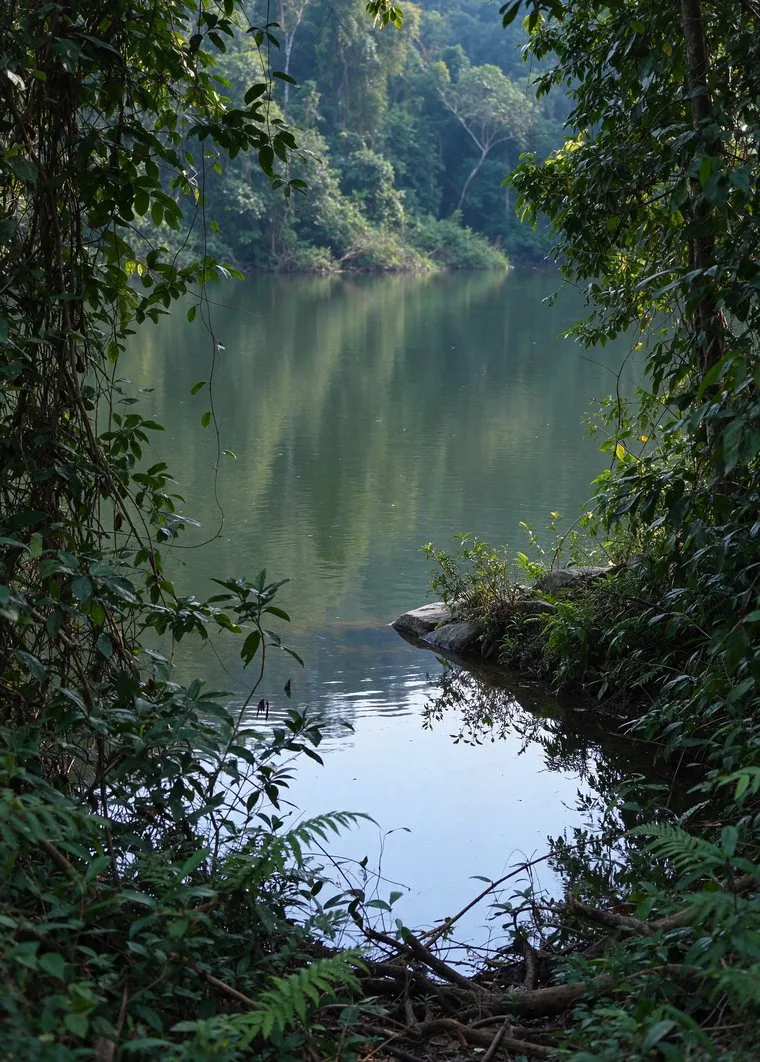
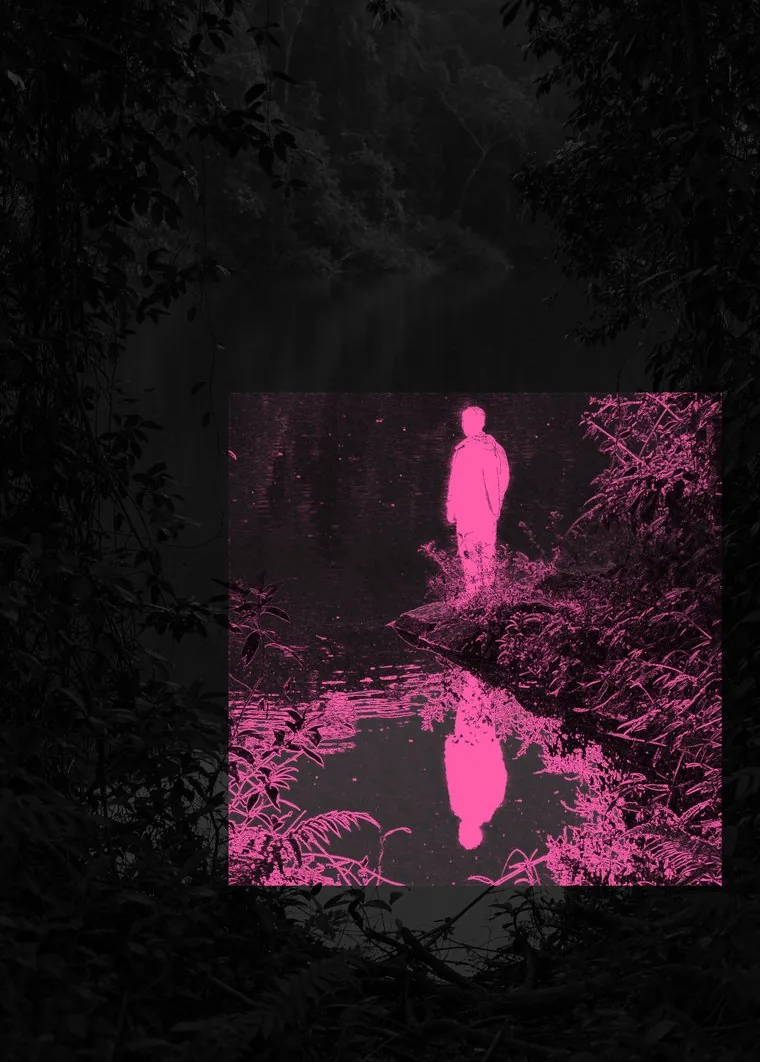
Five ways to remove things, compared: how to remove objects in Photoshop.
6. Denoise now works on any photo
Denoise used to work on raw files only. In Photoshop 2027 it works on any photo, JPEGs included, it costs nothing, and it uses no generative AI. Watch (14:47)
- Choose Filter › Camera Raw Filter.
- Scroll to Detail and tick Denoise.
- Zoom to 100% to judge it, set the amount, and click OK.
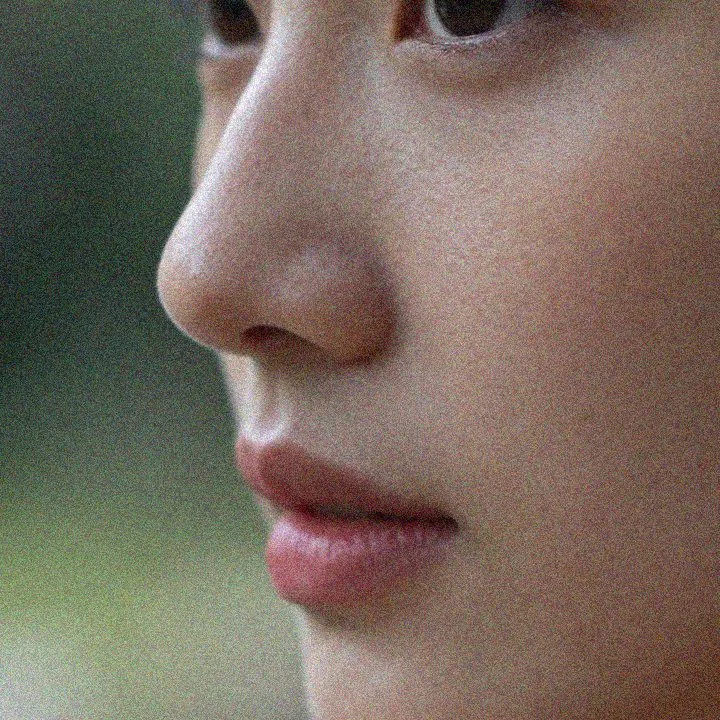
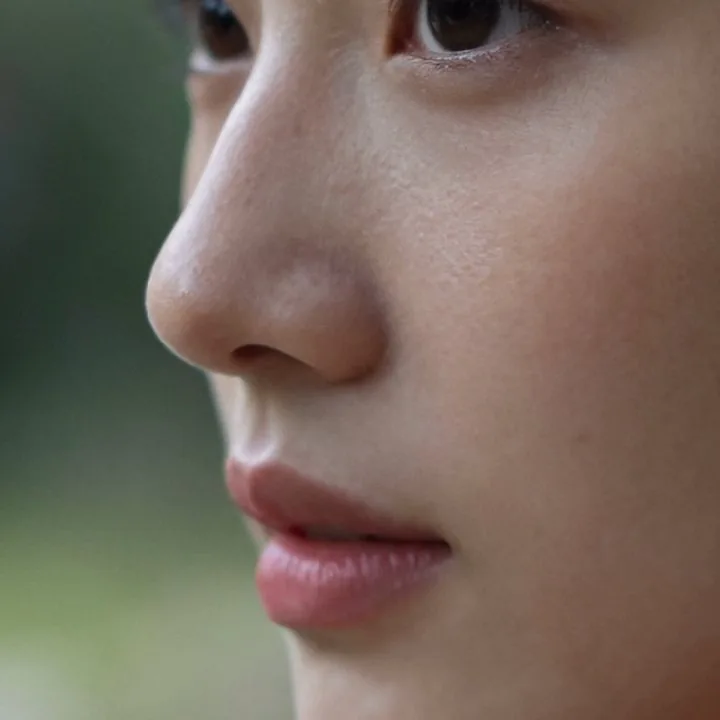
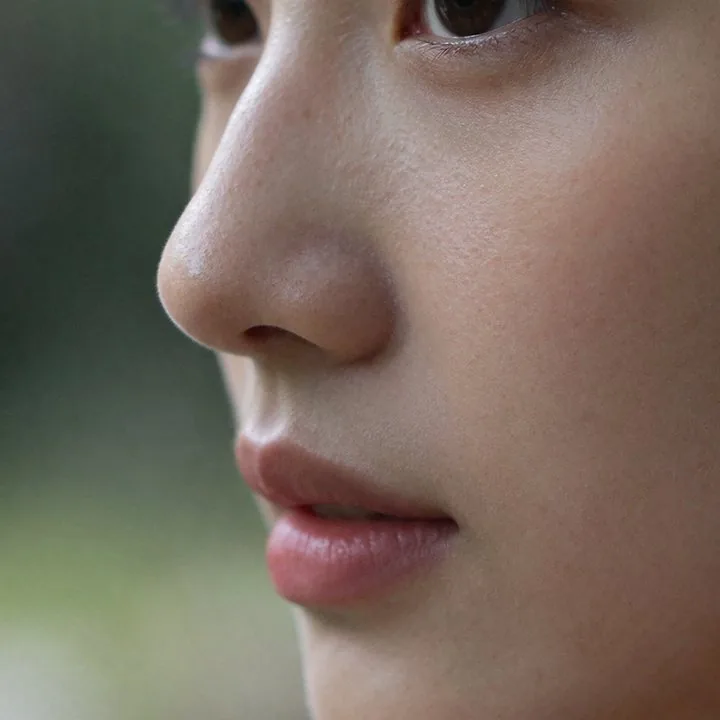
Try this first. It looked great, it changed nothing but the noise, and it's free. The middle picture is a frame from the video, so it's framed a little differently.
Another way, only when Camera Raw isn't enough: select the whole photo, choose Seedream 5.5 on Radbin's Create tab with the shape that matches your photo, and type denoise the image, for 3 or 4 credits. It's generative AI, so it can change small details; that's why Camera Raw comes first. Watch (15:52)
7. Quick Compare
One click shows your edit next to the photo as you opened it, split screen or one at a time. Watch (16:27)
- Edit as usual: paint, add effects, use any tool.
- Click Quick Compare, at the bottom left.
- Pick the view in the options bar: left and right, top and bottom, or one at a time.
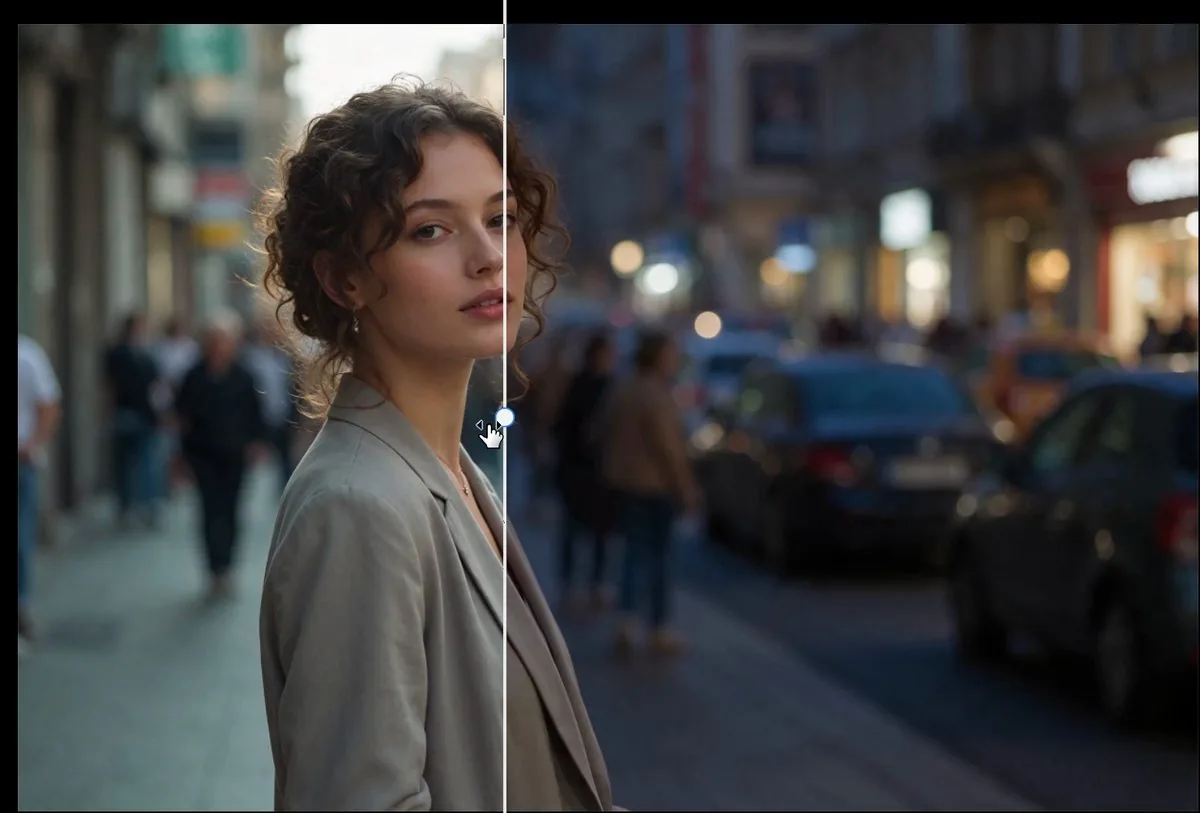
Good to know: the "before" is the file as you opened it. Start from a blank white document, place a photo in it, and your before is white. Cost: free.
8. Remove Blemishes in Camera Raw
Camera Raw's Remove tool has a newer entry in its Distraction Removal list: Blemishes. Strictly, it arrived a little before 28.0, with Camera Raw 18.5 in August 2026, but it's in Photoshop 2027 and most people haven't found it yet. Click Apply and it finds the spots by itself. Watch (17:29)
- Choose Filter › Camera Raw Filter, then the Remove tool on the right.
- Under Distraction Removal, choose Blemishes and click Apply.
- Two sliders decide how much goes: Blemishes, and Natural marks for small moles. At 100, they all go. Click OK.
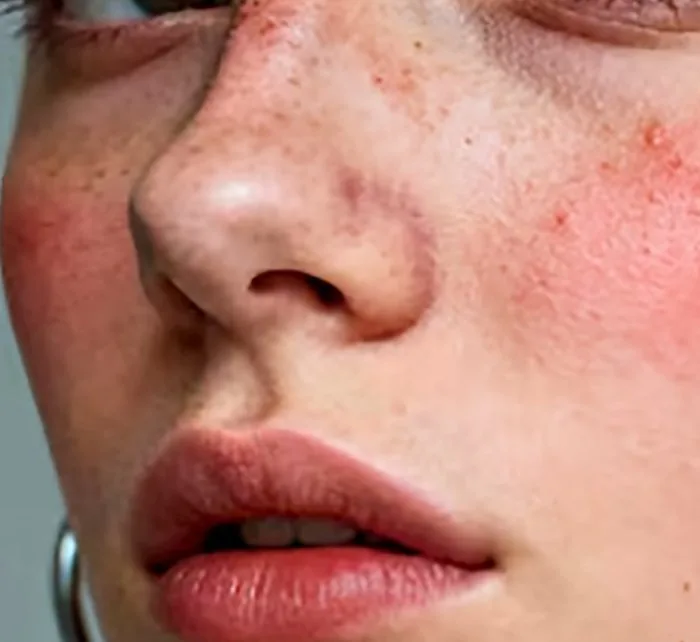
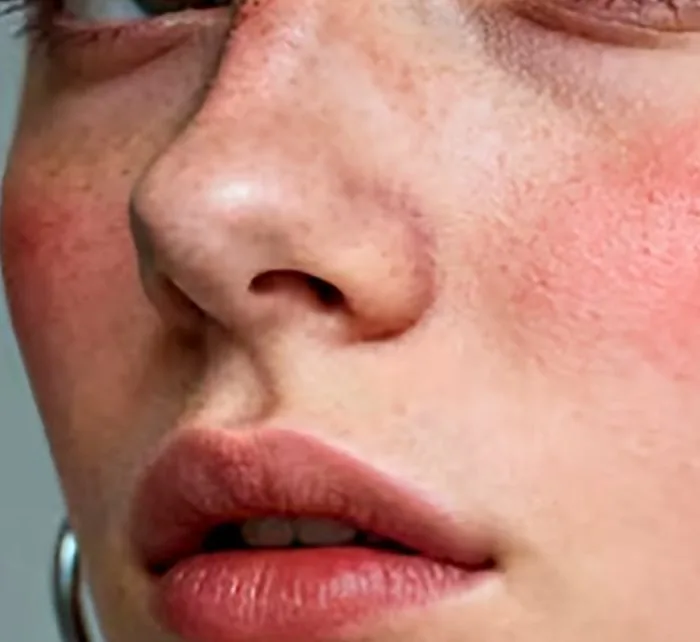
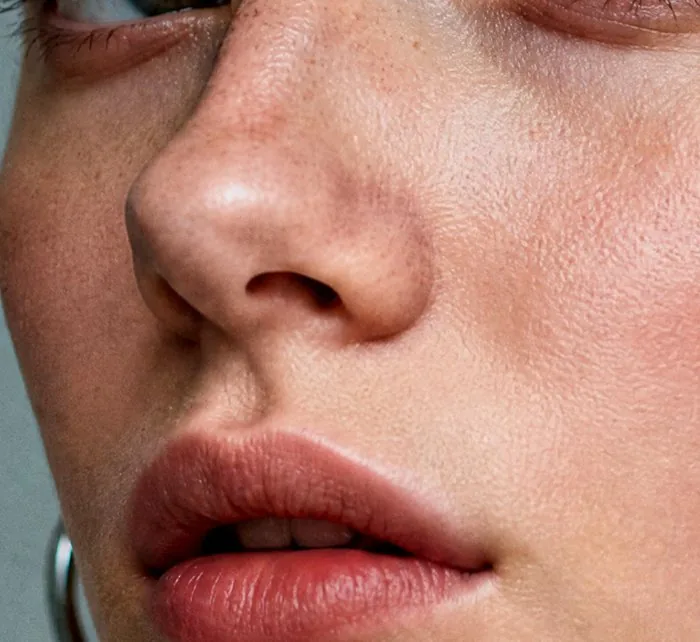
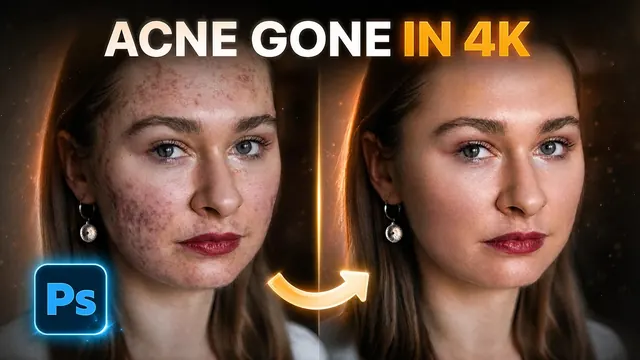
The spots were gone. The redness and the uneven tone stayed, because that isn't what this tool is for. Cost: free. For a quick spot clean-up, it's the first thing I'd try.
Another way, when the whole skin needs work: Cherry, Radbin's skin tool, cleared the spots and the redness, evened the tone and rebuilt the skin's texture, for 3, 5 or 7 credits at 1K, 2K or 4K. Watch (18:27) The full method: how to retouch skin in Photoshop without losing the texture.
What else is new in Photoshop 2027?
A few more things arrived with 28.0 that I haven't tested yet, according to CG Channel and Digital Camera World:
- Generative Restyle: redraws the image in another style, on its own layer with an intensity slider. CG Channel lists 80 generative credits per custom slider.
- Creative Agent: an AI agent across Creative Cloud apps that takes on routine tasks and answers how-to questions.
- Betas to try: Camera Angles (view the scene from another angle), Generative Recompose (a new aspect ratio with the subjects moved to fit), a Timelapse tool, haze and lens flare removal, a Mockup tool, and turning a flat file such as a flyer back into editable layers.
Is Photoshop 2027 worth updating to?
Yes, if only for the free changes. The hover menus save a click all day, Denoise on JPEGs fixes old phone photos for nothing, and Quick Compare is the quickest honest check of any edit. Remove Blemishes is a fine first pass on skin.
The AI features are better than last year, but they cost generative credits and each one has a catch: check the pupils after Generative Upscale, the hair after Relight, and the whole photo after Remove related elements. Where I wanted more control, I used Radbin's tools in the same Photoshop window, and every result came back as a layer I could mask.
Every Radbin tool in this post, inside Photoshop
Ultra, Lightsmith, Seedream 5.5 and Cherry are on one panel, with no API keys. Every result lands as a layer, and a failed job refunds itself.
Watch Radbin on YouTube
Real tests and tutorials, inside Photoshop and Premiere. See the whole channel.
 19:57Claude Opus 5.5 edits my video in Premiere Pro
 16:20GPT Image 2.6 in Photoshop: images, vectors and GIFs
 7:37Upscale a low res portrait to 4K in Photoshop
 19:25Relight any photo in Photoshop with AI
 20:03Nano Banana 2.1 vs GPT Image 2 and FLUX 3: ten tests
 14:31Photoshop Relight vs Radbin Lightsmith
 10:24Retouch skin without losing the texture
 9:28Every Radbin tool in 9 minutes
 9:50Fix the focus of any photo after it was taken
 1:43Radbin changes only what you ask