 Radbin
The short answer: for a small enlargement of a good photo, use Image Size with Preserve Details 2.0. To double a photo with nothing invented, use Super Resolution in Camera Raw. For 4× or more on a small or soft photo, you need a generative upscaler: Photoshop 2027's Generative Upscale, or an AI upscaler inside Photoshop like the three in Radbin. And whichever you pick, check the eyes at 100%.
Full disclosure: I make Radbin, the plugin in way 4. The pictures below are real results from my test in Photoshop 2027, so you can judge them yourself.
The upscaling part of my Photoshop 2027 video, from 0:38.
Which way to upscale in Photoshop?
| Way | Where | How big | Adds detail? | Cost |
|---|---|---|---|---|
| 1. Image Size | Image › Image Size | Any size | No | Free |
| 2. Super Resolution | Camera Raw, Enhance | 2× each side | A little, faithfully | Free |
| 3. Generative Upscale | Image › Generative Upscale | 2× or 4× | Yes | 10 or 20 generative credits |
| 4. Radbin Upscale | Radbin › Enhance › Upscale | Up to 8× (Ultra), 10× (Pruna, Crystal) | Ultra and Crystal yes, Pruna no | 1 to 4 credits (Ultra), from 3 |
1. Image Size with Preserve Details 2.0
The classic way, and still the right one for a small jump: a good photo that needs to be a little bigger for print.
- Choose Image › Image Size (Option+Cmd+I on a Mac, Alt+Ctrl+I on Windows).
- Tick Resample and choose Preserve Details 2.0.
- Type the new width or height, or a percentage, with the link on so the proportions hold.
- If the result looks grainy, raise Reduce Noise a little, then click OK.
It's free and it changes nothing in the picture, but it can't add what isn't there. Push a small face much past 2× and the eyes, the lashes and the hair are as blurry as before, only bigger.
2. Super Resolution in Camera Raw
Super Resolution doubles the width and the height, so the photo gets four times the pixels. It's trained to stay faithful, it works best on raw files, and it also takes JPEGs and TIFFs. It isn't in Filter › Camera Raw Filter: you open the file itself in Camera Raw.
- A raw file opens in Camera Raw by itself. For a JPEG or TIFF, choose File › Open, pick the file, and set Format to Camera Raw.
- Right-click the photo and choose Enhance (Cmd+Shift+D on a Mac, Ctrl+Shift+D on Windows), then tick Super Resolution.
- Camera Raw saves a new file next to the original, with "Enhanced" in its name. Open that one in Photoshop.
It's free and it doesn't invent. The limits: it stops at 2× each side, and a heavily compressed JPEG gets its blocks enlarged with everything else.
3. Generative Upscale, new in Photoshop 2027
Photoshop 2027 gave Generative Upscale a new model, Firefly Upscaler 2, and two partner models from Topaz: Gigapixel, which Adobe describes as "preserve existing detail", and Bloom, "add new, creative detail". The whole list of what's new is in Photoshop 2027's new features.
- Open the photo and choose Image › Generative Upscale.
- Pick the model: Firefly Upscaler 2, or Topaz Gigapixel or Topaz Bloom under Partner models.
- Pick the scale, 2× or 4×, and click Upscale. The result opens as a new document.
Cost: 10 generative credits for images up to 25 megapixels and 20 up to 67, from your Creative Cloud plan.
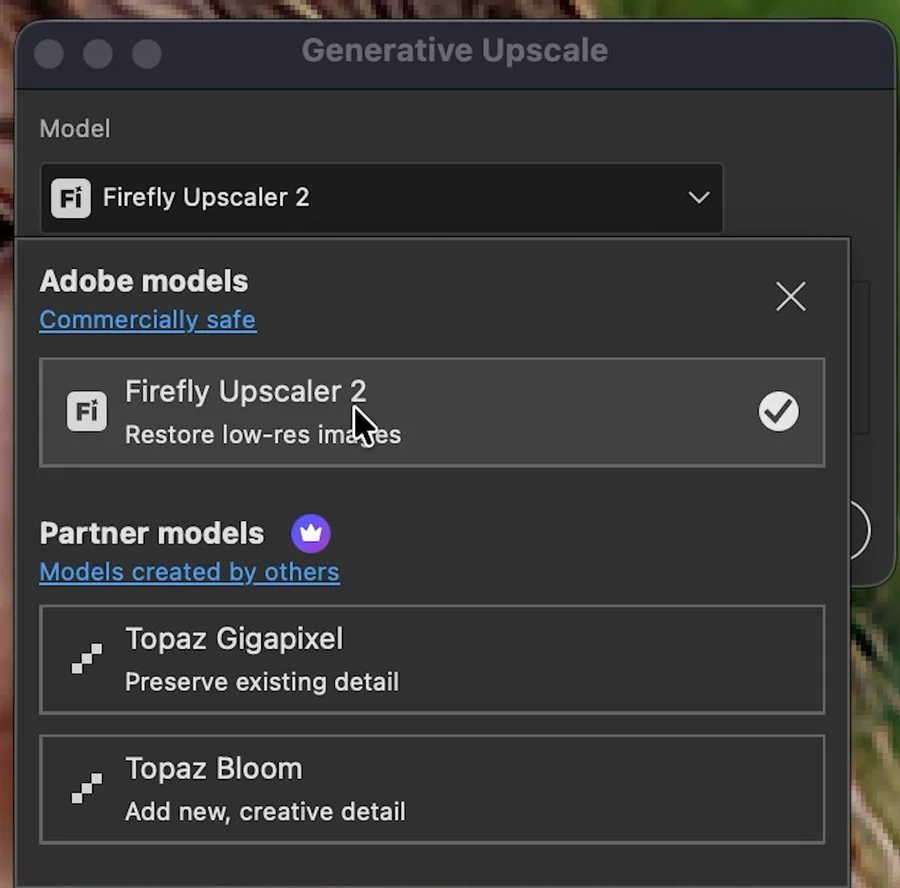
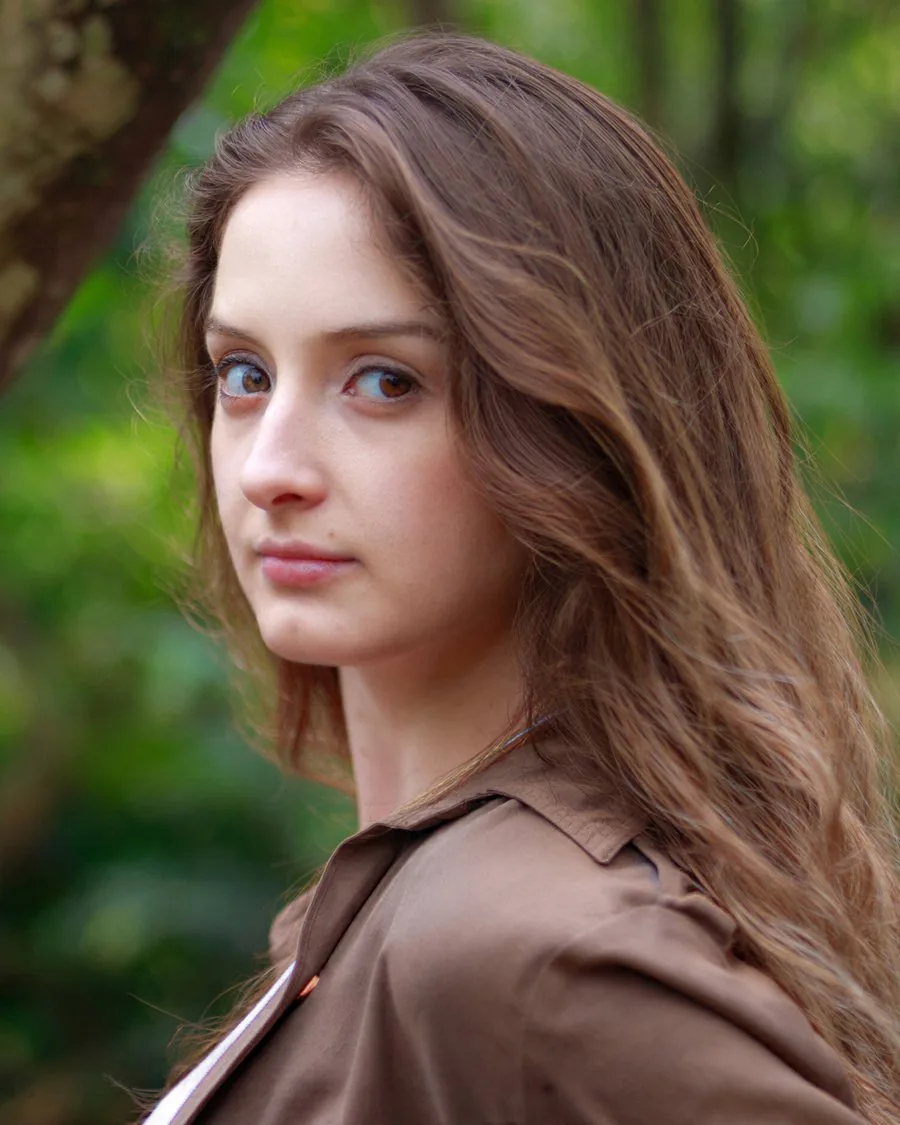
I tested Firefly Upscaler 2 at 4× on a portrait of 450 × 500 pixels. It added real detail to the skin and the hair, but the pupils came out misshapen. Watch (0:38)
4. An AI upscaler inside Photoshop: Ultra, Pruna and Crystal
Radbin is the AI plugin for Photoshop I make. Its Upscale tool has three engines on one panel, and the result lands in your document as a layer, or the whole document grows to match.
- Ultra, the newest: 2×, 4× or 8×, up to 16,384 pixels a side, for 1, 2 or 4 credits by the size it makes (up to 4, 17 or 67 megapixels). It's also faster than Crystal.
- Pruna, the faithful one: it enlarges without inventing, for product shots and portraits that are already retouched. Up to 10×, from 3 credits.
- Crystal, the creative one: it adds detail to a small or soft source so it looks sharp at print size. Up to 10×, from 3 credits.
- Select the area to enlarge, or nothing for the whole photo.
- In the Radbin panel, open Enhance › Upscale. Pick Ultra, Pruna or Crystal, and the scale.
- Under Document, choose Keep size to place the result as a smart object, or Resize to match to grow the file with it.
- Click Apply. The price is on the button before you click, and a failed job refunds itself.
The test: the same eyes, four upscalers
The same 450 × 500 portrait, the same crop of the eyes, at the same final size.
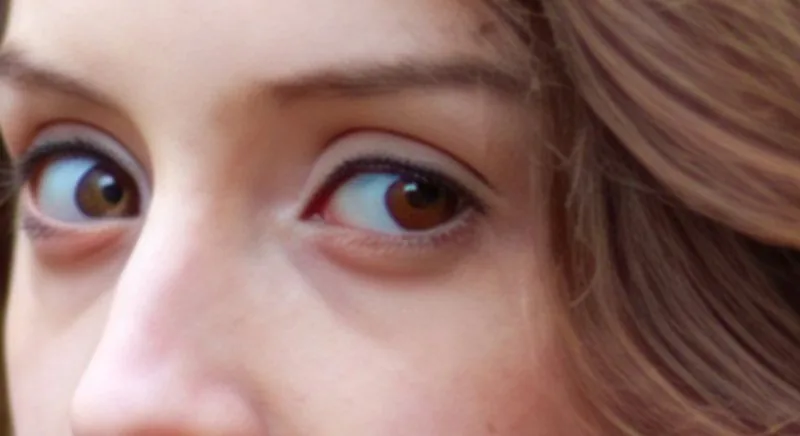
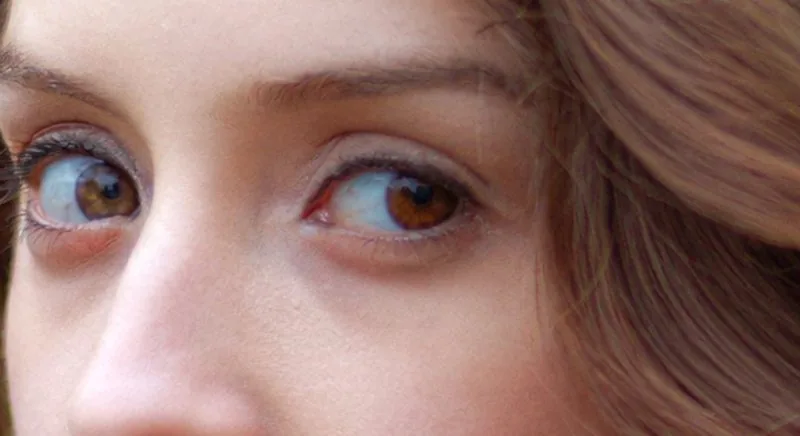
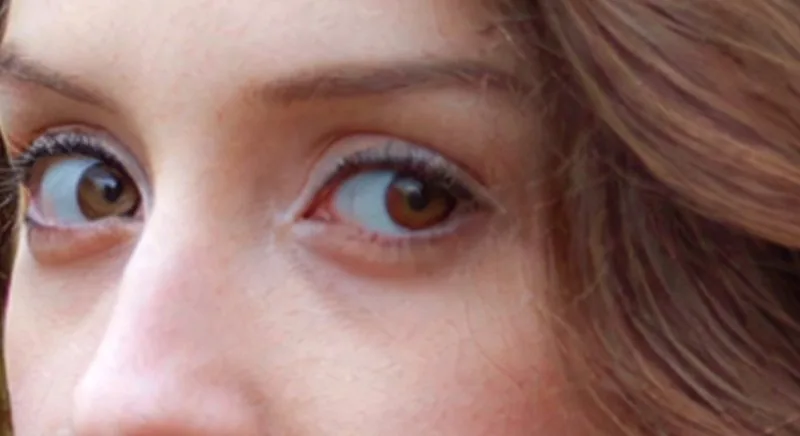
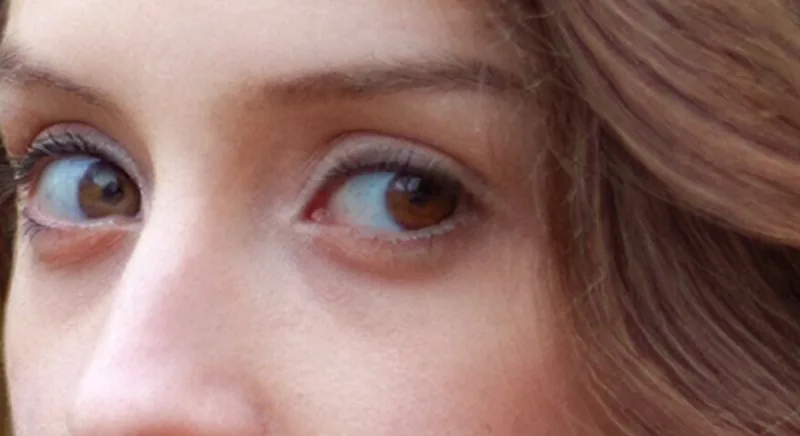
Pruna kept more detail than Firefly, even in the hair. Ultra was the best of the four: it fixed the pupils, and the skin and the hair came out sharp. Watch the comparison (1:53)
Which upscaler for which photo?
- A good photo, a little bigger: Image Size with Preserve Details 2.0. Free, and nothing changes.
- A raw file at twice the size: Super Resolution.
- A small or soft photo, 4× or more: start with Ultra. Use Pruna when nothing may be invented, like a product's label, and Crystal when a soft source needs detail to hold up in print. In Photoshop alone, Generative Upscale, then check the eyes.
- A tiny face, like a crop from a group photo: an upscaler only has a few pixels of face to work with. Studio portrait rebuilds the portrait at 4K instead: how to upscale a low res portrait to 4K.
- An old, damaged print: repair it first, then upscale. See how to restore old photos in Photoshop.
Tips for a cleaner upscale
- Crop first, then upscale. Both Photoshop and Radbin charge by the size of the image, so the pixels you crop away cost nothing.
- Judge at 100%. Fitted to the screen, every upscale looks fine. The eyes, the lashes and fine hair tell the truth.
- Sharpen after you upscale, not before. Sharpen first and the upscaler enlarges the halos too.
- Compare the face with the original. A generative upscaler draws new detail, and on a small face that detail decides who it looks like.
Upscale inside Photoshop, from 1 credit
Ultra, Pruna and Crystal are on Radbin's Enhance tab, next to 14 other tools and twelve image models. The price is on the button, and a failed job refunds itself.
Watch Radbin on YouTube
Real tests and tutorials, inside Photoshop and Premiere. See the whole channel.
 19:57Claude Opus 5.5 edits my video in Premiere Pro
 16:20GPT Image 2.6 in Photoshop: images, vectors and GIFs
 7:37Upscale a low res portrait to 4K in Photoshop
 19:25Relight any photo in Photoshop with AI
 20:03Nano Banana 2.1 vs GPT Image 2 and FLUX 3: ten tests
 14:31Photoshop Relight vs Radbin Lightsmith
 10:24Retouch skin without losing the texture
 9:28Every Radbin tool in 9 minutes
 9:50Fix the focus of any photo after it was taken
 1:43Radbin changes only what you ask