 Radbin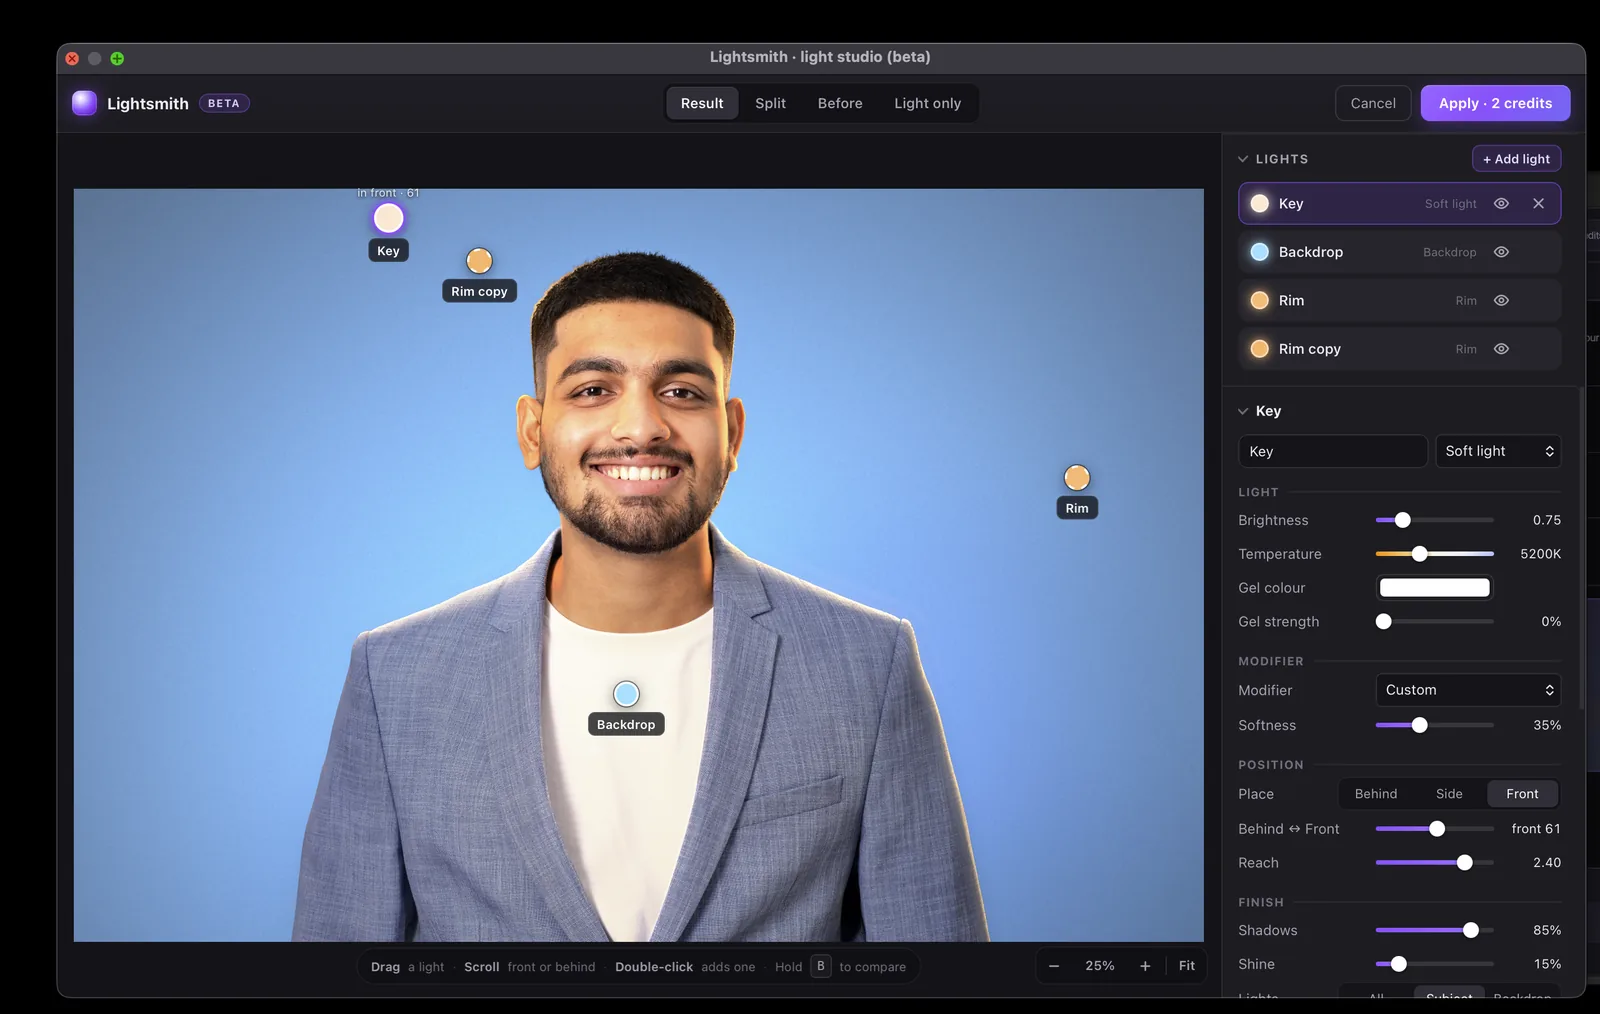
This is the how-to. The Lightsmith page shows results and what it costs, and the tutorial walks through a portrait and a villa from start to finish.
Before you start
- Photoshop 2025 (26.0) or newer, on macOS or Windows. The rest of Radbin runs on Photoshop 23.3 and newer.
- Radbin with a plan. Lightsmith is on the Enhance tab, marked Beta.
- Credits. Trying lights is free. Applying a result costs 2 credits. They are held when you click Apply, and given back if Photoshop can't place the result.
Open the studio
Open a photo, go to Enhance → Lightsmith and click Open the studio. The first time, Lightsmith reads the photo, which takes 10 to 30 seconds: how far away each part is, which way each surface faces, where the subject ends, and what is in it, from faces and hair to sky, water, windows and plants. After that, every light moves live.
The studio window
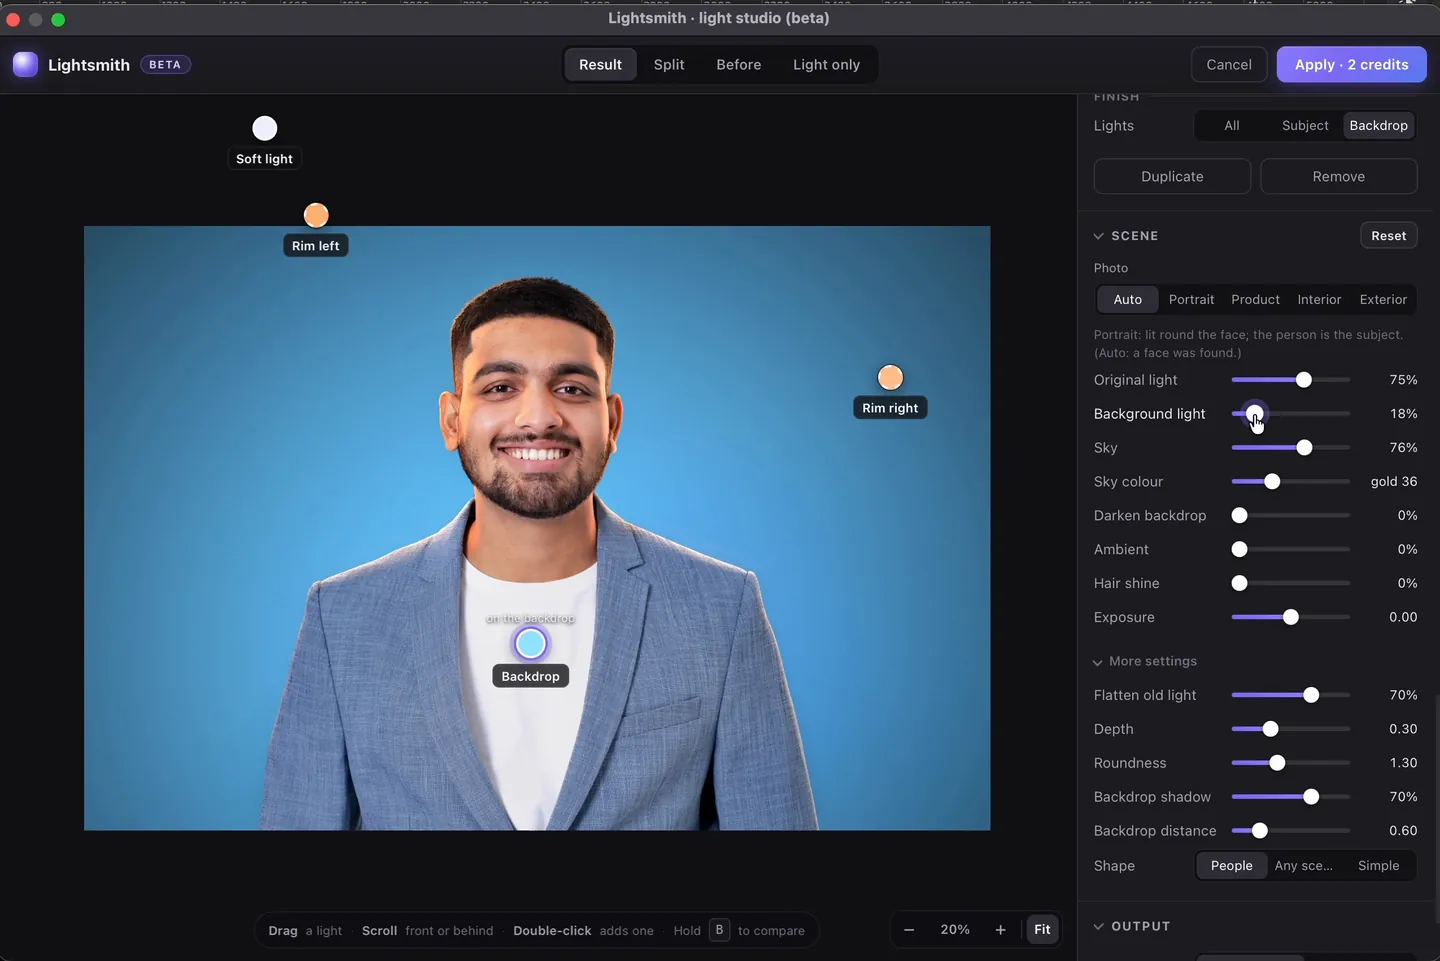
- Result, Split, Before, Light only at the top: the lit photo, a before and after split you can drag, the original, or only the light you are adding.
- Drag a light to move it. Scroll to move it in front of or behind the subject. Double-click the photo to add a light. Hold B to compare with the original.
- Cancel closes the studio and leaves your document alone. Apply places the result, with the cost on the button.
Setups
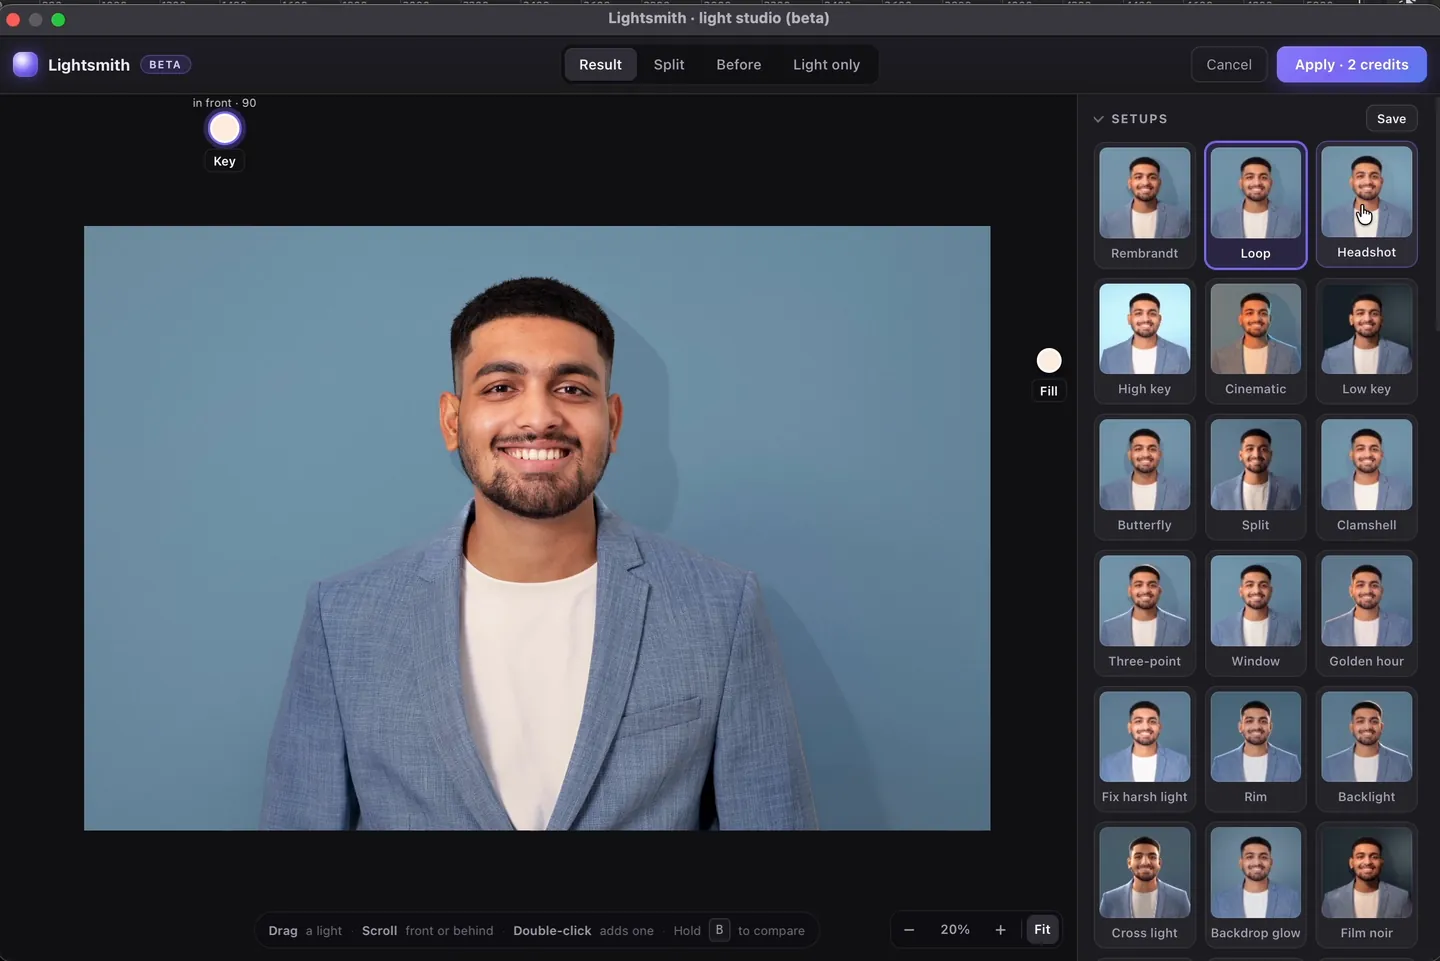
Setups are starting points, each one previewed on your own photo. Lightsmith shows the set for your kind of photo:
| Photo | Setups |
|---|---|
| Portrait (25) | Rembrandt, Loop, Headshot, High key, Cinematic, Low key, Butterfly, Split, Clamshell, Three-point, Window, Golden hour, Fix harsh light, Rim, Backlight, Cross light, Backdrop glow, Film noir, Old Hollywood, Spotlight, Neon, Night street, Candle, Moonlight, Screen glow |
| Exterior (6) | Golden hour, Blue hour, Lights on, Night, Bright sun, Moonlight |
| Interior (7) | Morning light, Bright & airy, Golden sunbeam, Evening lamps, Cinematic night, Gallery spots, Neon night |
| Product (8) | Studio softbox, Hero spotlight, Edge light, Top light, Window daylight, Golden hour, Dark & moody, Colour pop |
Lightsmith decides the kind of photo by itself. To change it, use Photo under Scene: Auto, Portrait, Product, Interior or Exterior.
Your own setups. Build a lighting you like and click Save above the setups. It appears under Yours on every photo, placed round the face or the subject of each new photo.
The six lights
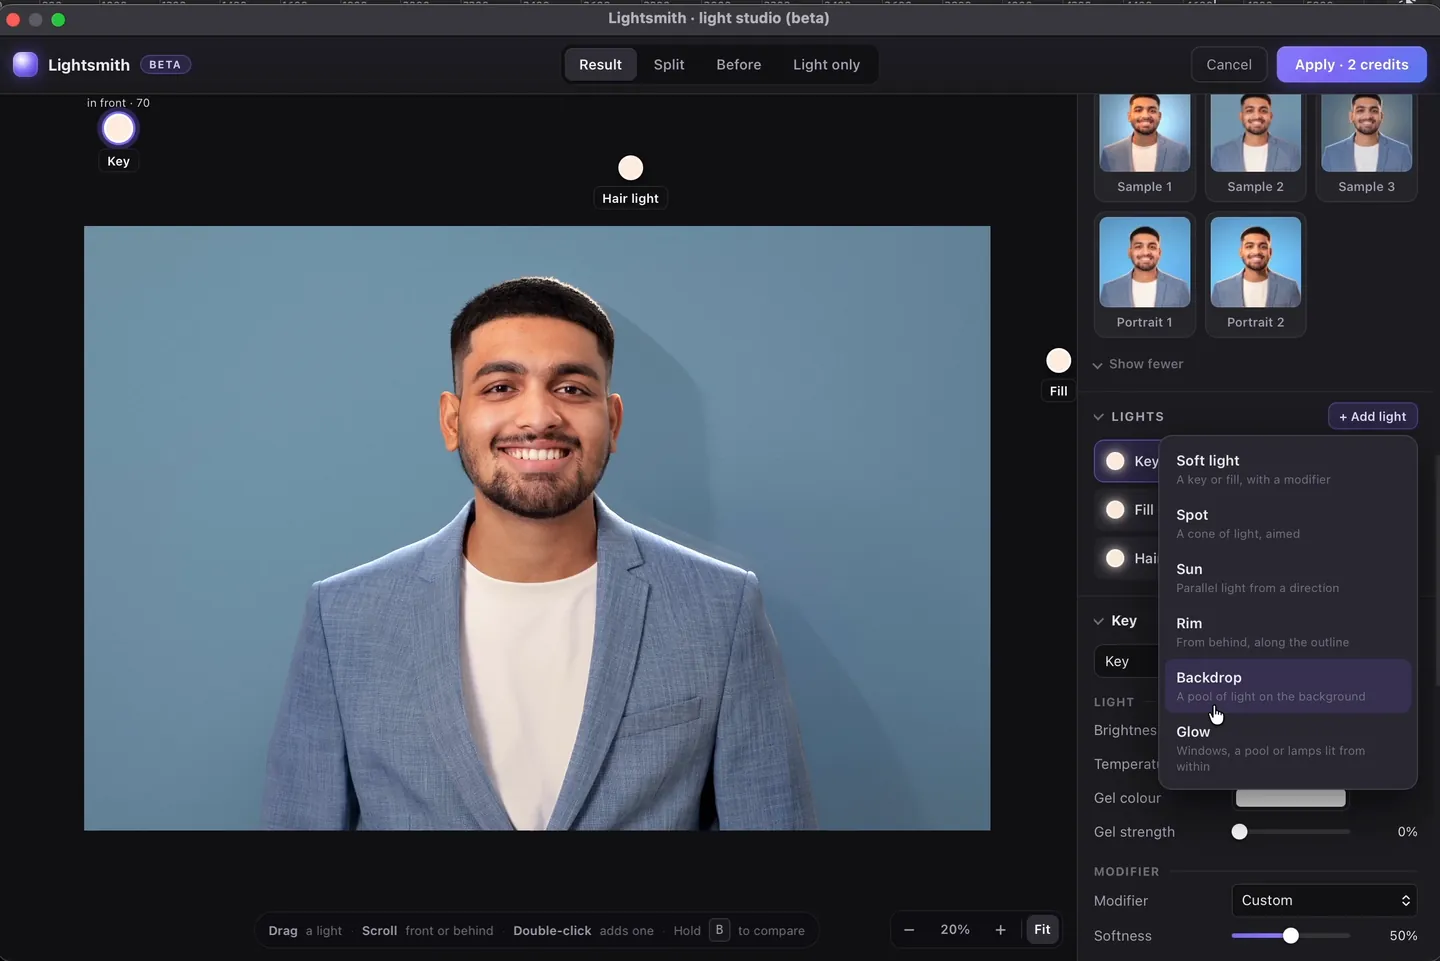
Click + Add light and choose one:
| Light | What it is | Good for |
|---|---|---|
| Soft light | A key or a fill, shaped by a modifier | The main light on a face, or a fill |
| Spot | A cone of light you aim | A pool of light, a wall wash |
| Sun | Parallel light from one direction | Daylight, golden hour |
| Rim | Light from behind, along the outline | Edges, hair, lifting the subject off the background |
| Backdrop | A pool of light on the background | Lighting the wall behind the subject |
| Glow | Windows, a pool or lamps lit from within | Night scenes, pools, lit windows |
In the Lights list, the eye turns a light off and the cross removes it. Duplicate, at the bottom of a light's settings, copies it with everything set.
A light's settings
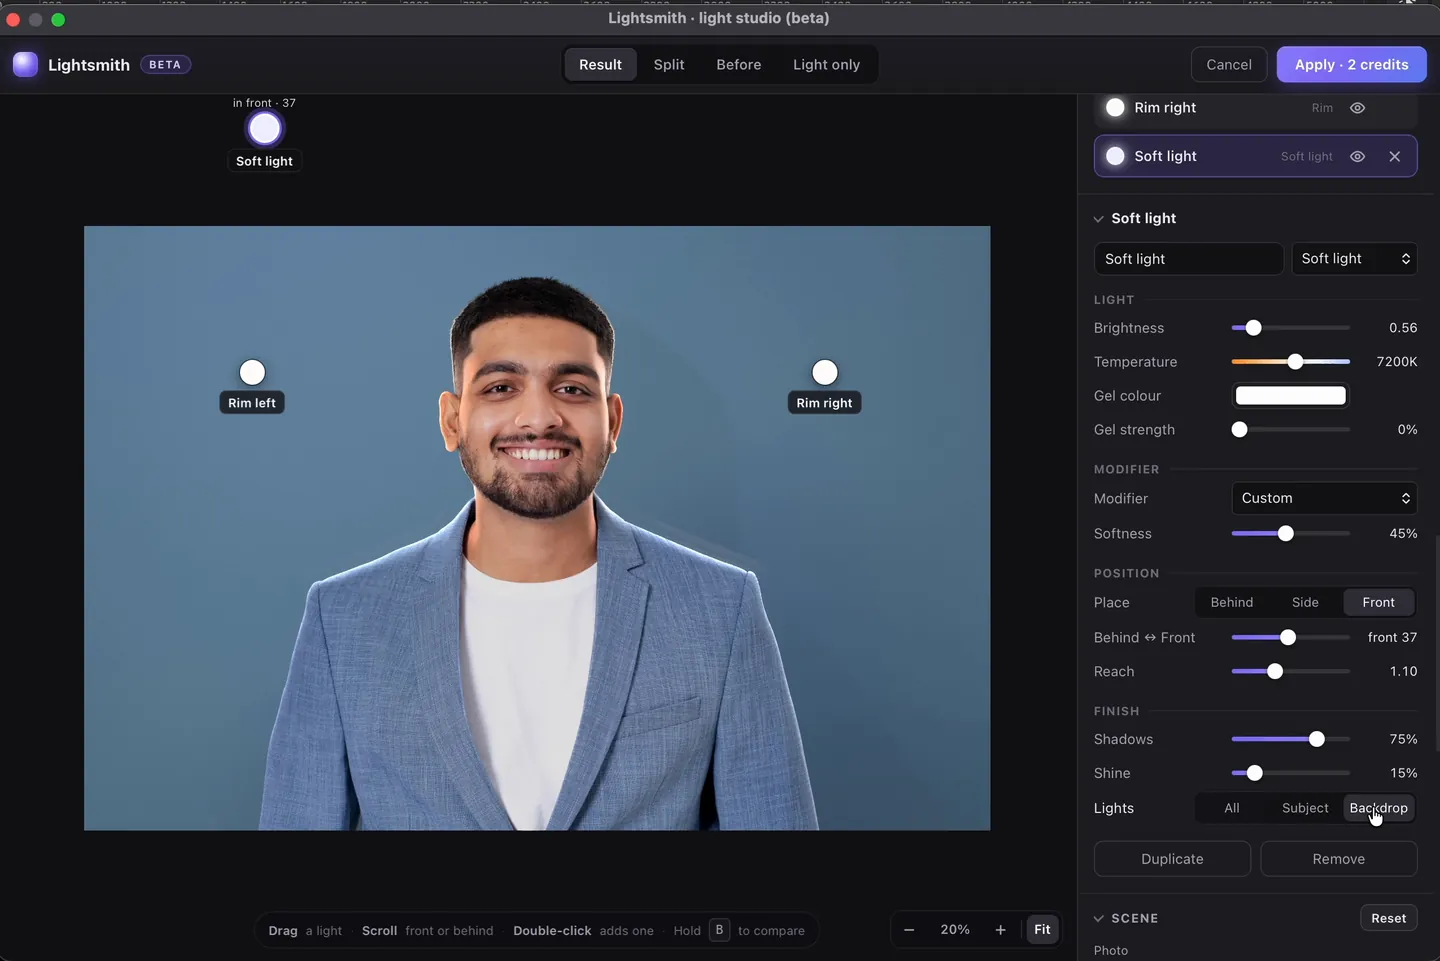
- Brightness: how strong the light is.
- Temperature: warm to cool, in kelvin.
- Gel colour and Gel strength: colour the light, like a gel on a real lamp.
- Modifier: Bare bulb, Beauty dish, Softbox, Octabox, Umbrella, Window, Grid or Snoot, or Custom. Each one sets the softness and the spread. Grid and Snoot make a narrow spot with its own Cone and Feather.
- Softness: from a small, hard source to a big, soft one.
- Place: Behind, Side or Front, and the Behind ↔ Front slider for anything in between.
- Reach: how far the light travels before it fades.
- Shadows: how dark the shadows it casts are.
- Shine: the highlight it leaves on skin and glossy surfaces.
- Lights: All, Subject or Backdrop, the part of the photo this light falls on.
A Backdrop light also has Pool size. A Glow light has Lights up: Windows, Pool or Lamps.
Scene settings
These change the photo itself, not your lights.
- Photo: Auto, Portrait, Product, Interior or Exterior.
- Original light: how much of the photo's own light stays.
- Background light: the photo's own light on the background.
- Sky and Sky colour: darken or brighten a sky, and tint it towards dusk blue or gold.
- Darken backdrop: keeps your lights off the background, except Backdrop lights, for a darker backdrop.
- Ambient: a little even light everywhere, to lift the darkest parts.
- Hair shine: a sheen on the hair.
- Exposure: the brightness of the whole result.
- More settings: Flatten old light, Depth, Roundness, Backdrop shadow, Backdrop distance and Shape, to fine-tune how Lightsmith reads the shape of the photo.
Reset puts the Scene settings back.
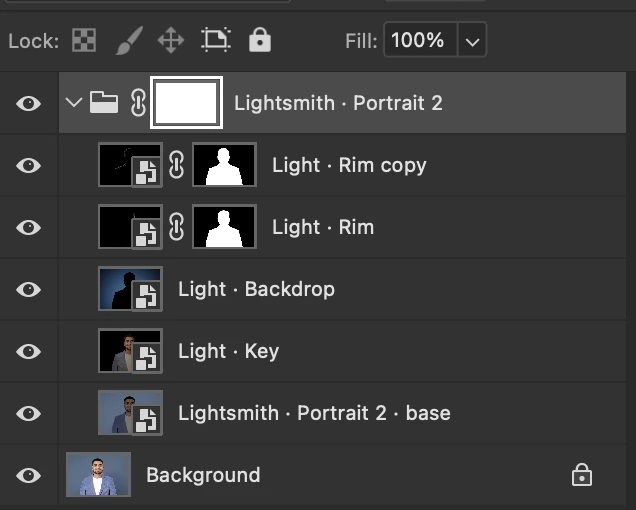
Apply: one layer, or one per light
Under Output, choose Layers:
- One layer: the finished light on a single layer above your photo.
- One per light: a folder with a base layer and every light on its own Linear Dodge layer, so you can dim, mask or recolour each light later.
Click Apply. The result lands in your document in one step, and one undo removes it. Open Lightsmith again and it remembers your lights and settings.
Fixing common problems
- A bright halo along the edge. Usually a strong rim light. Apply one per light, add a mask to that light's layer and paint black over the halo. Step by step.
- A light spills onto the wall. Set that light's Lights to Subject, or raise Darken backdrop.
- A building was lit like a portrait. Set Photo to Exterior, Interior or Product under Scene.
- The sky is too bright for a night shot. Lower Sky under Scene and give it a Sky colour. The full day to night walk-through.
- The first open is slow. Reading a photo takes 10 to 30 seconds. After that, everything is live.
Watch it
The whole tutorial, a portrait and a villa, on YouTube: