 Radbin
What you need: Photoshop 2025 (26.0) or newer on a Mac or a Windows PC, and the Radbin plugin. Lightsmith is on Radbin's Enhance tab. Trying lights is free; applying a result costs 2 credits.
The whole tutorial on YouTube, 19 minutes. Each step below links to its moment in the video.
Can you relight a photo in Photoshop?
Yes, in two ways. Photoshop has its own Relight, but for now it is only in the Photoshop beta: you add a new Relight layer, place a light, and wait. In my test, every move and every setting change took 6 to 10 seconds to show. Here is how the two compare.
The way I show here is Lightsmith, the light studio in my Radbin plugin. It works in regular Photoshop, the lights move live while you drag them, and the result comes back as layers. Full disclosure: Radbin is mine, so judge the before and after shots for yourself.
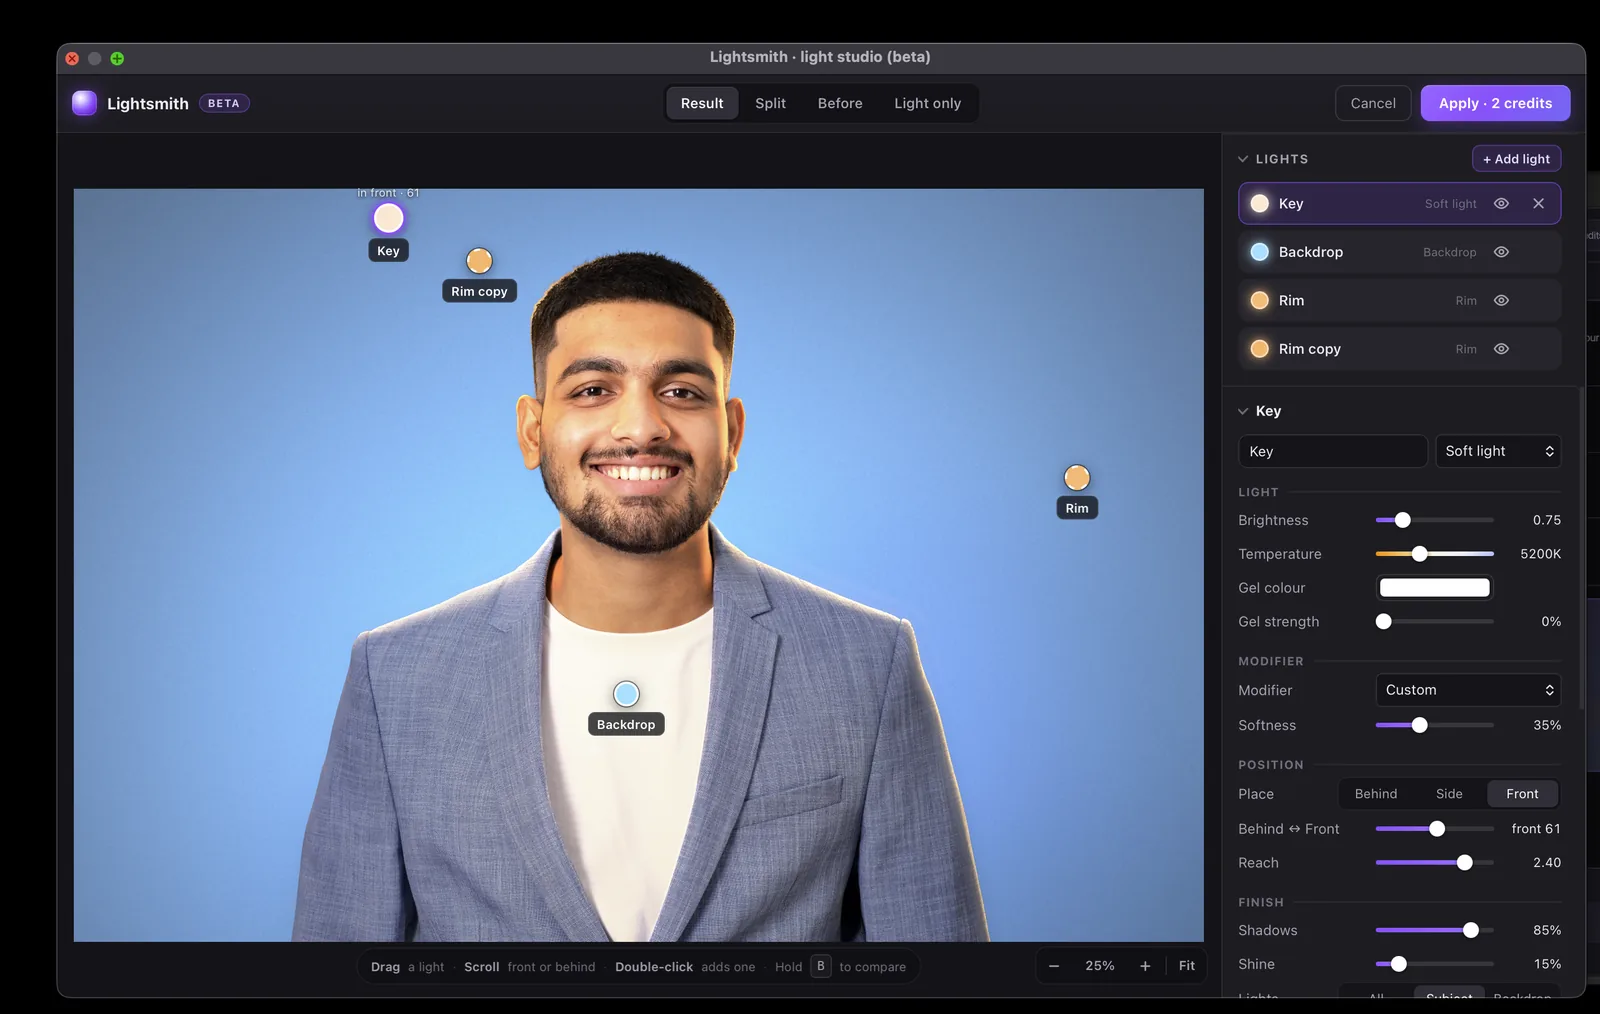
Step 1: Open Lightsmith
Open your photo in Photoshop. In the Radbin panel, go to the Enhance tab, find Lightsmith and click Open the studio.
The first time, it takes 10 to 30 seconds to read the photo: how far away each part is, which way each surface faces, where the subject ends, and what is in the picture. That is what lets it light your photo like a real 3D scene instead of painting light on top. Watch this step (2:48)
Step 2: Start from a setup that fits the photo
On the right you get setups made for your kind of photo, each one previewed on your own picture. A portrait gets 25 of them, from Rembrandt, Loop and Butterfly to Cinematic, Film noir and Neon. Click one, keep the one you like as your starting point, or remove the lights and start from nothing.
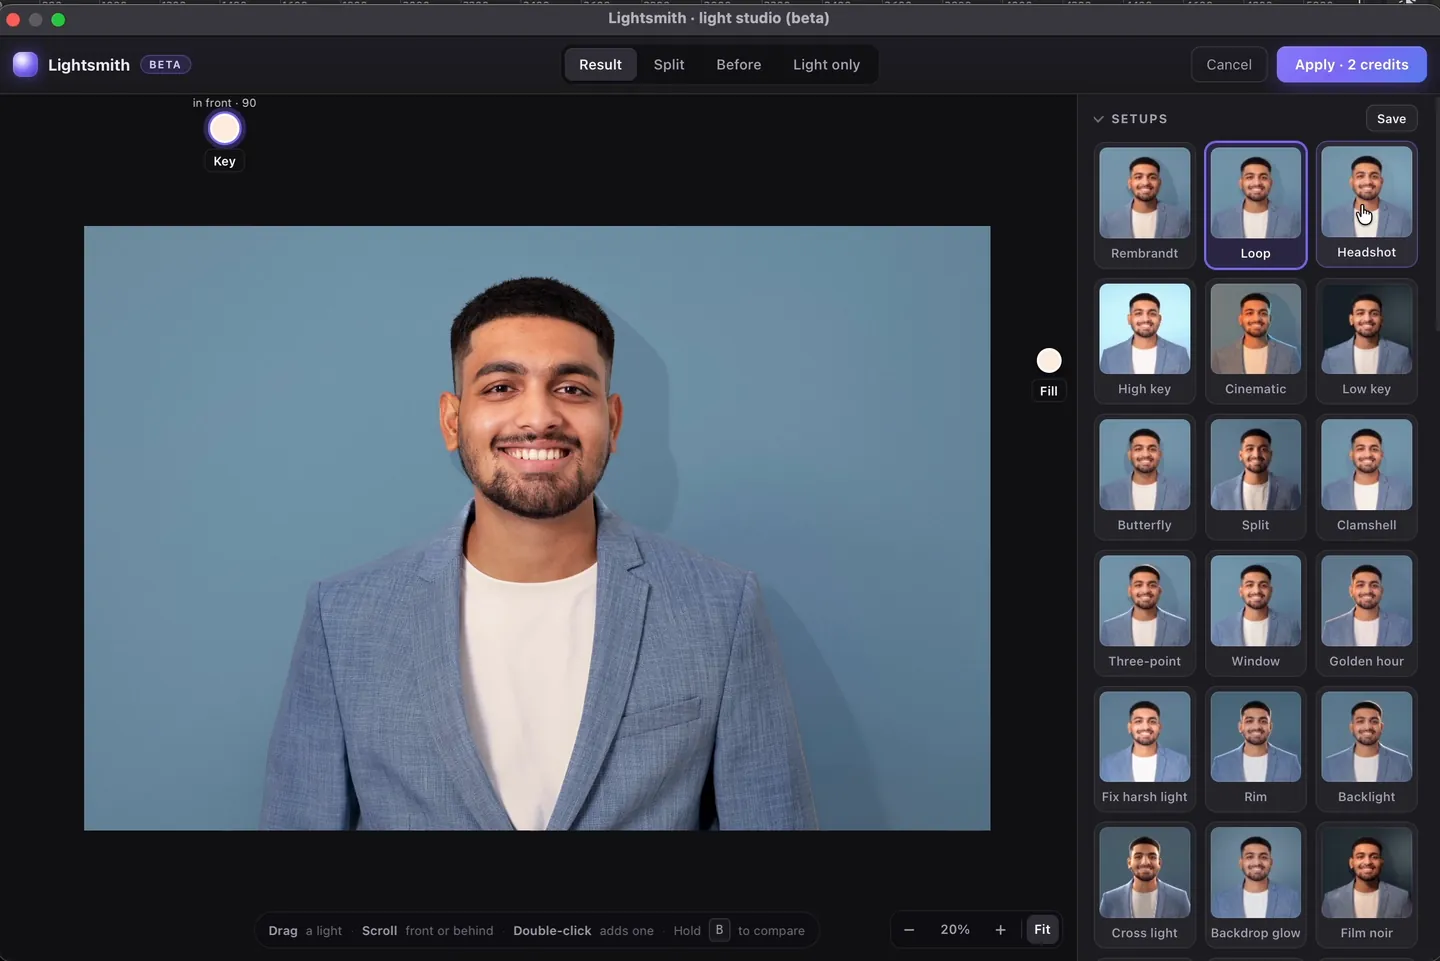
When you build a lighting you like, click Save above the setups. It appears under Yours, on every photo you open after that.
Step 3: Add a key light, on the subject only
I started from the Rim setup, which has two rim lights, and added a key light: Add light → Soft light. I lowered its brightness and made it a little cooler.
Every light has a Lights switch at the bottom of its settings: All, Subject or Backdrop. On All, my key light lit the wall behind him too. On Subject it lights only him, and the shadows on his face stay. Watch (4:07)
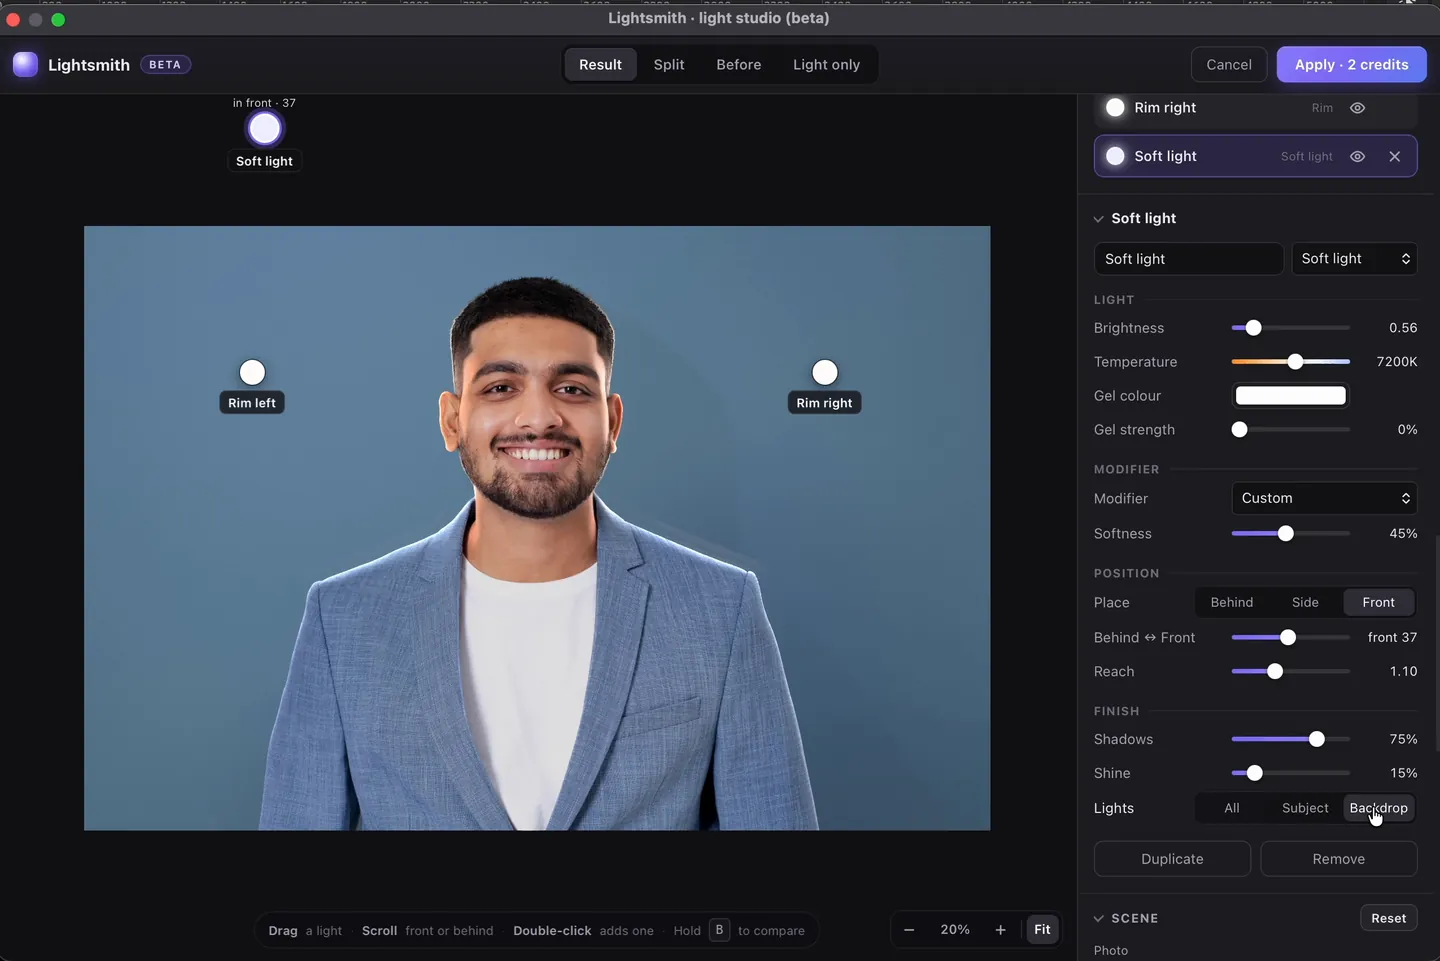
Step 4: Pick a modifier
Under Modifier you choose the kind of light, like on a real set: bare bulb, beauty dish, softbox, octabox, umbrella, window, grid or snoot. Each one sets the softness and the spread for you, and a grid or a snoot turns the light into a narrow spot you can aim. I left mine on Custom and raised the softness a little.
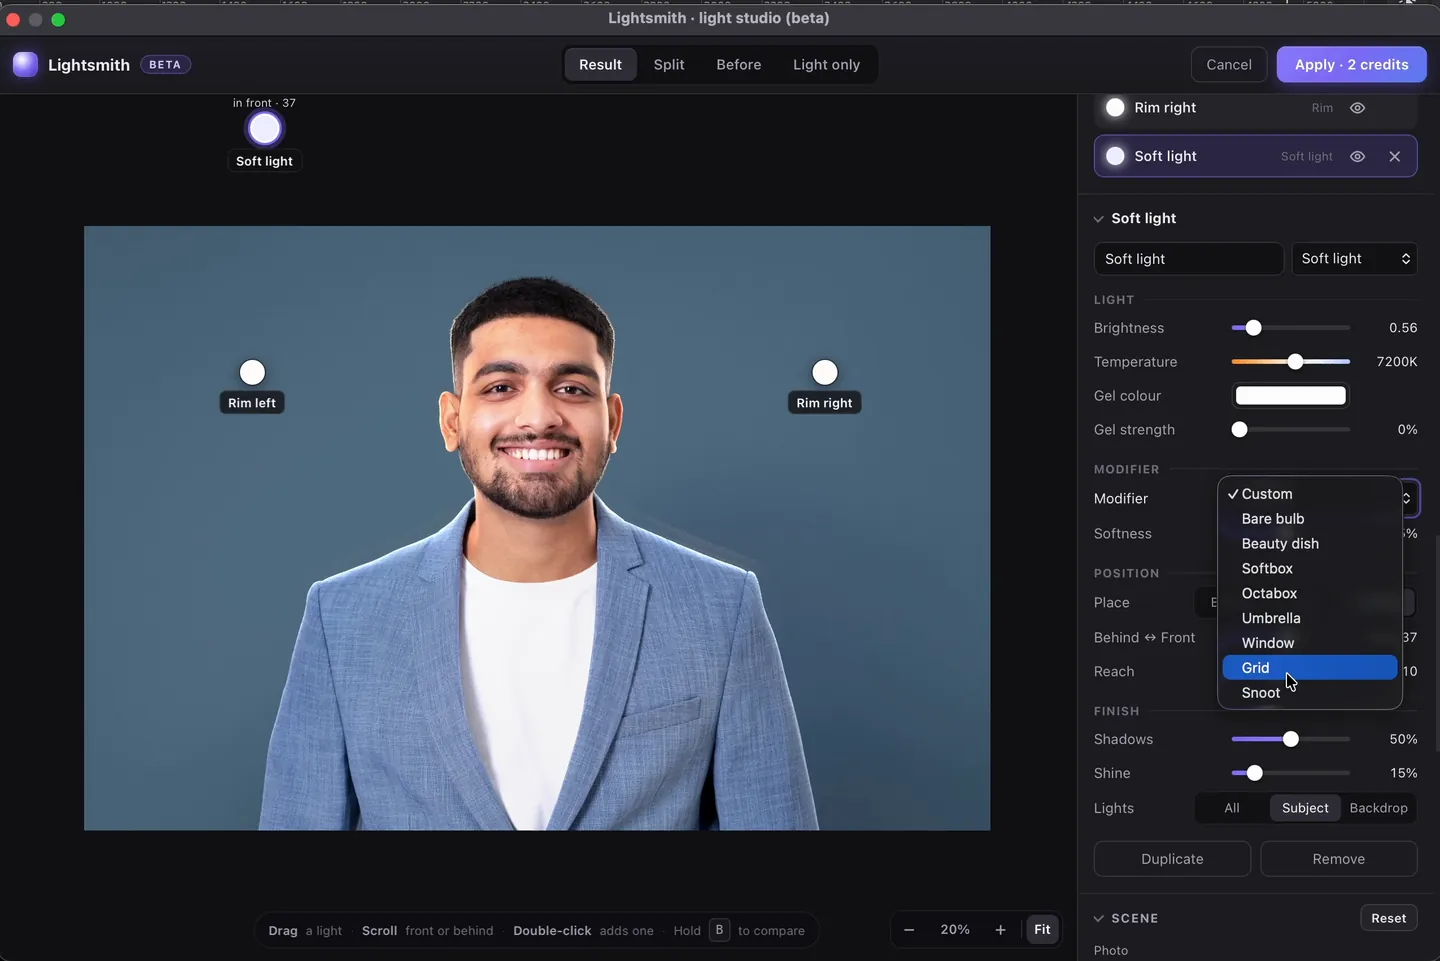
Step 5: Place the rim lights, live
Drag a light on the photo and it moves right away. There is no loading after each move, and that is the biggest difference from Photoshop's Relight. Watch (5:08)
To move a light forward or back, use Place (Behind, Side or Front), the Behind ↔ Front slider, or scroll on the photo. I made both rim lights warmer and lowered their brightness.
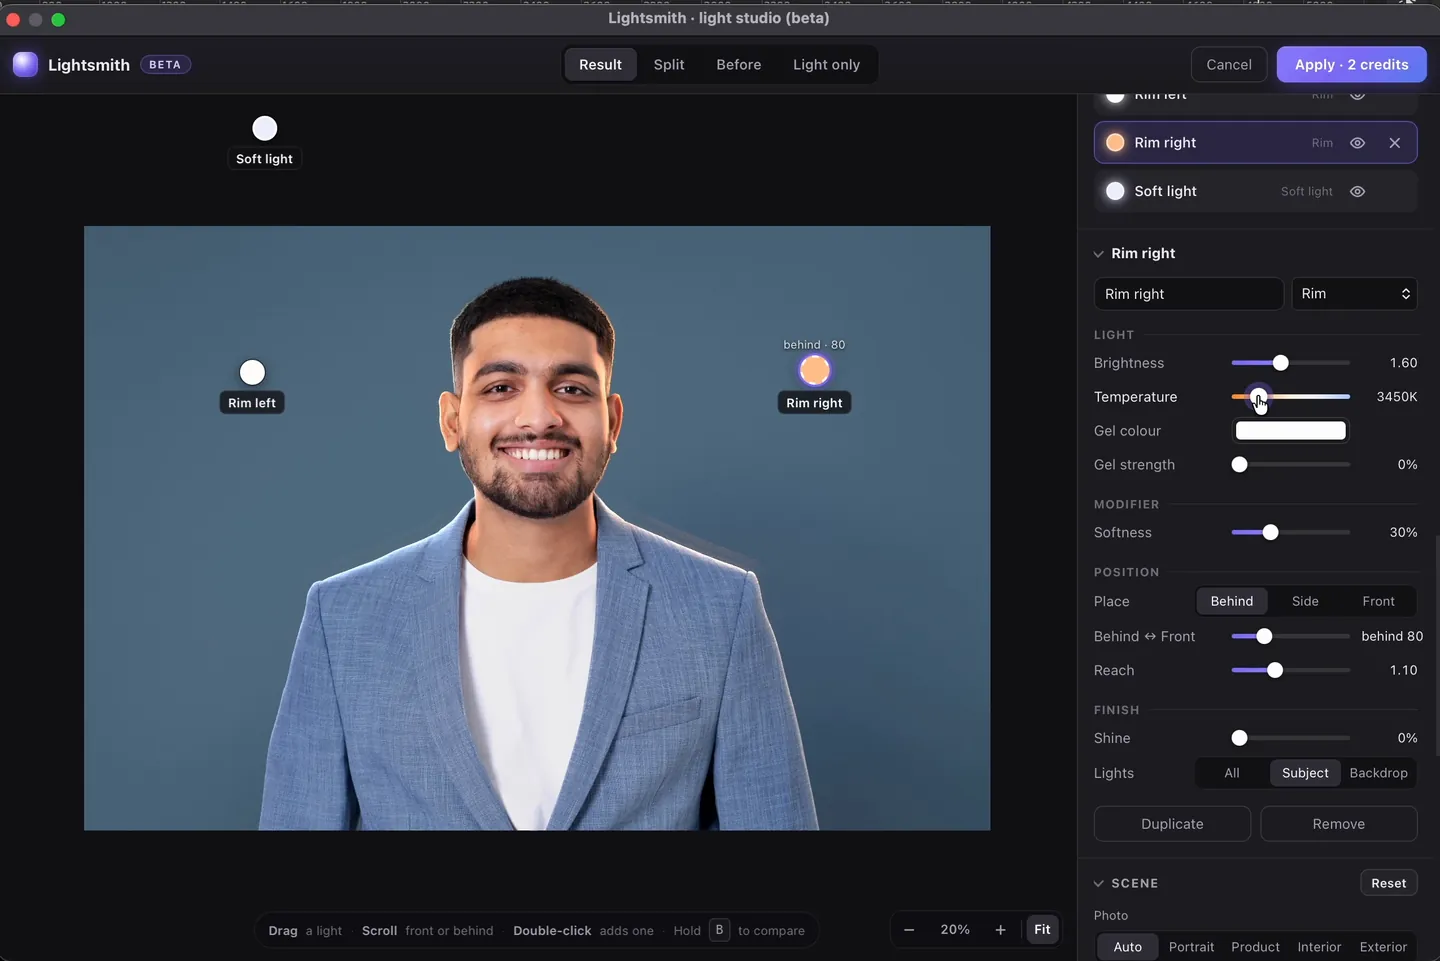
Step 6: Duplicate a light for the hair
If you like a light and want another one like it, click Duplicate. I duplicated a rim light and moved the copy up above his head and a little to the front, so warm light catches his hair and the side of his face. Watch (6:09)
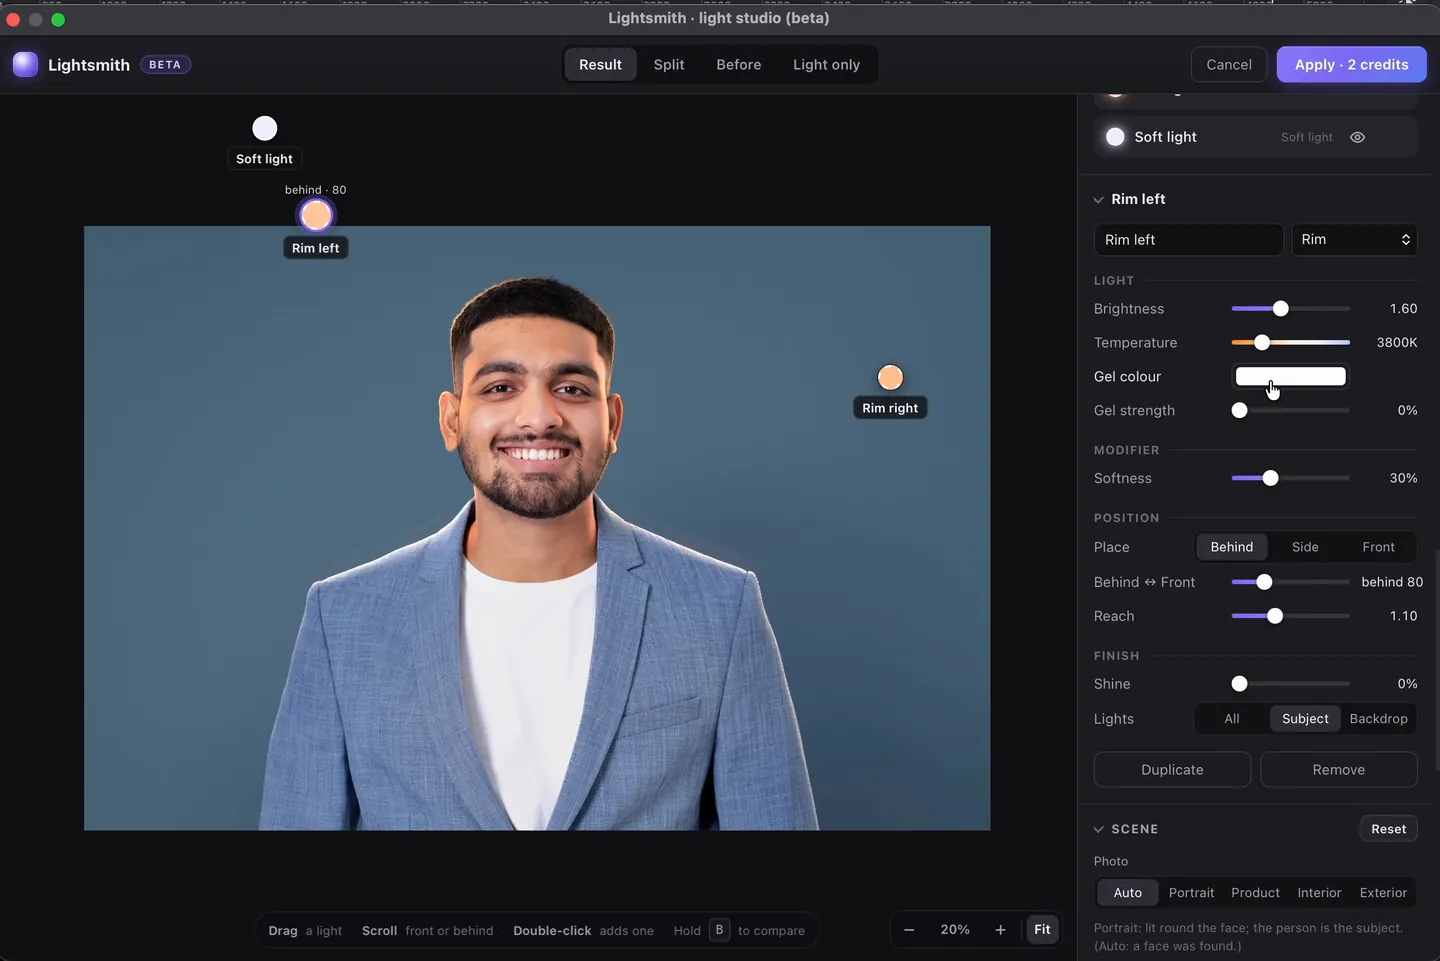
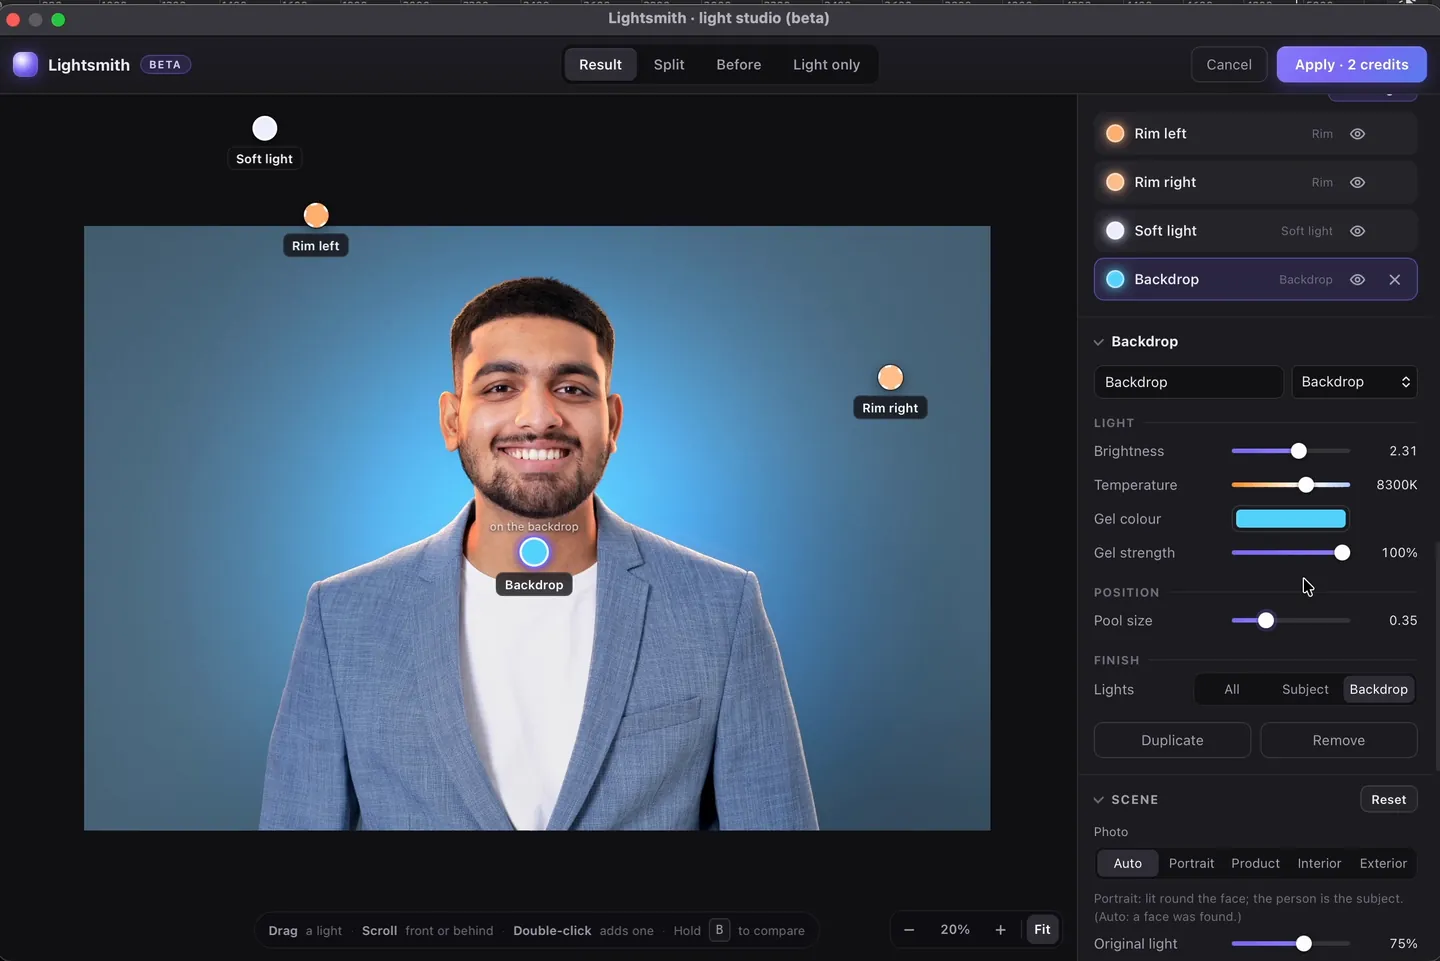
Step 7: Light the backdrop
Add light → Backdrop adds a pool of light on the background only. I made it brighter and cooler, gave it a light blue gel, and changed the Pool size. Photoshop's Relight has no light like this yet. Watch (6:47)
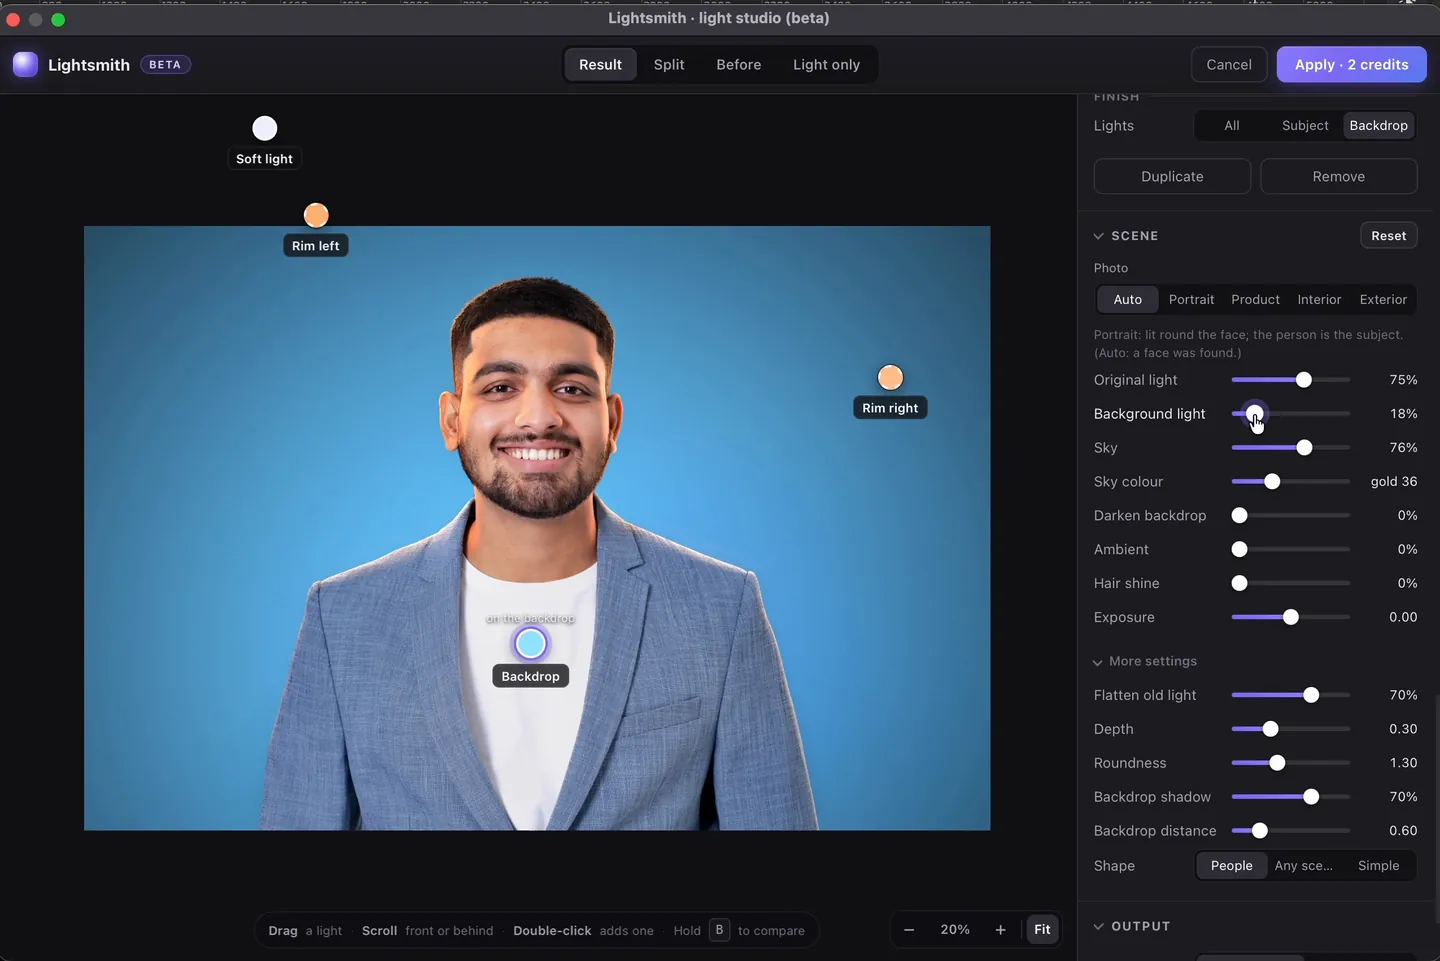
Step 8: Change the photo's own light
The Scene settings work on the photo itself, not on your lights. Background light turns down the light that was already on the background. Sky darkens or brightens a sky, if there is one. Hair shine adds a sheen to the hair; zoom in to see it. Watch (7:26)
Step 9: Apply as one layer, or one layer per light
Under Output you have two choices. One layer gives you the finished light on a single layer. One per light gives you a folder with a base layer and every light on its own Linear Dodge layer. Click Apply: it costs 2 credits, and the result lands in your document. Watch (8:15)
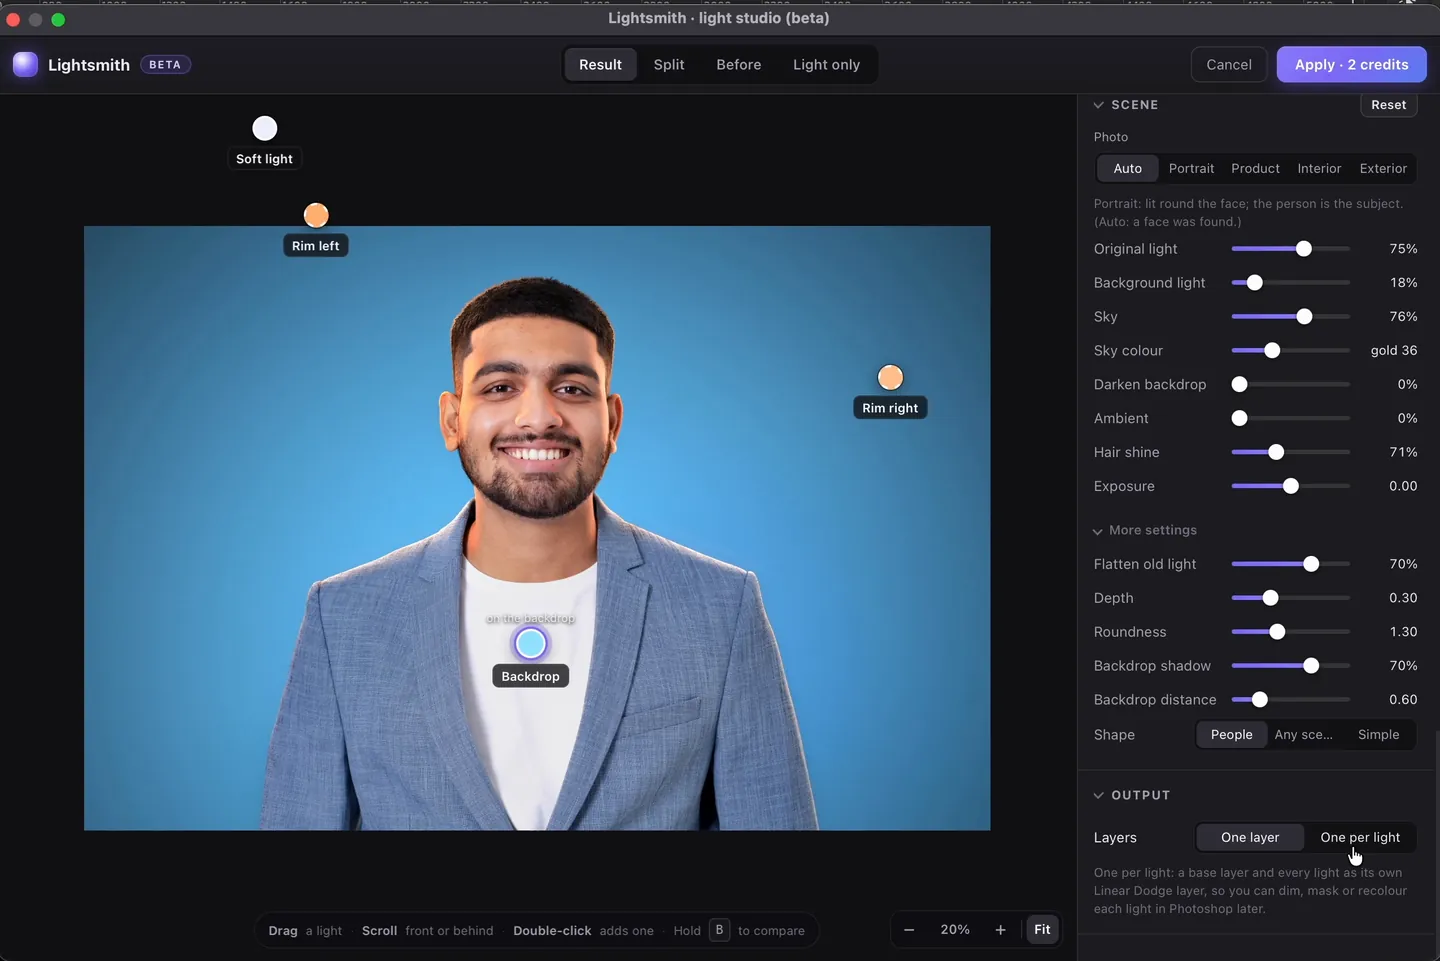
You can open Lightsmith again at any time. It remembers every light and every setting from last time, so you can change one thing and apply again.
Lightsmith is on Radbin's Enhance tab: free to try, 2 credits per result.
Get RadbinStep 10: Fix and restyle the result with layers
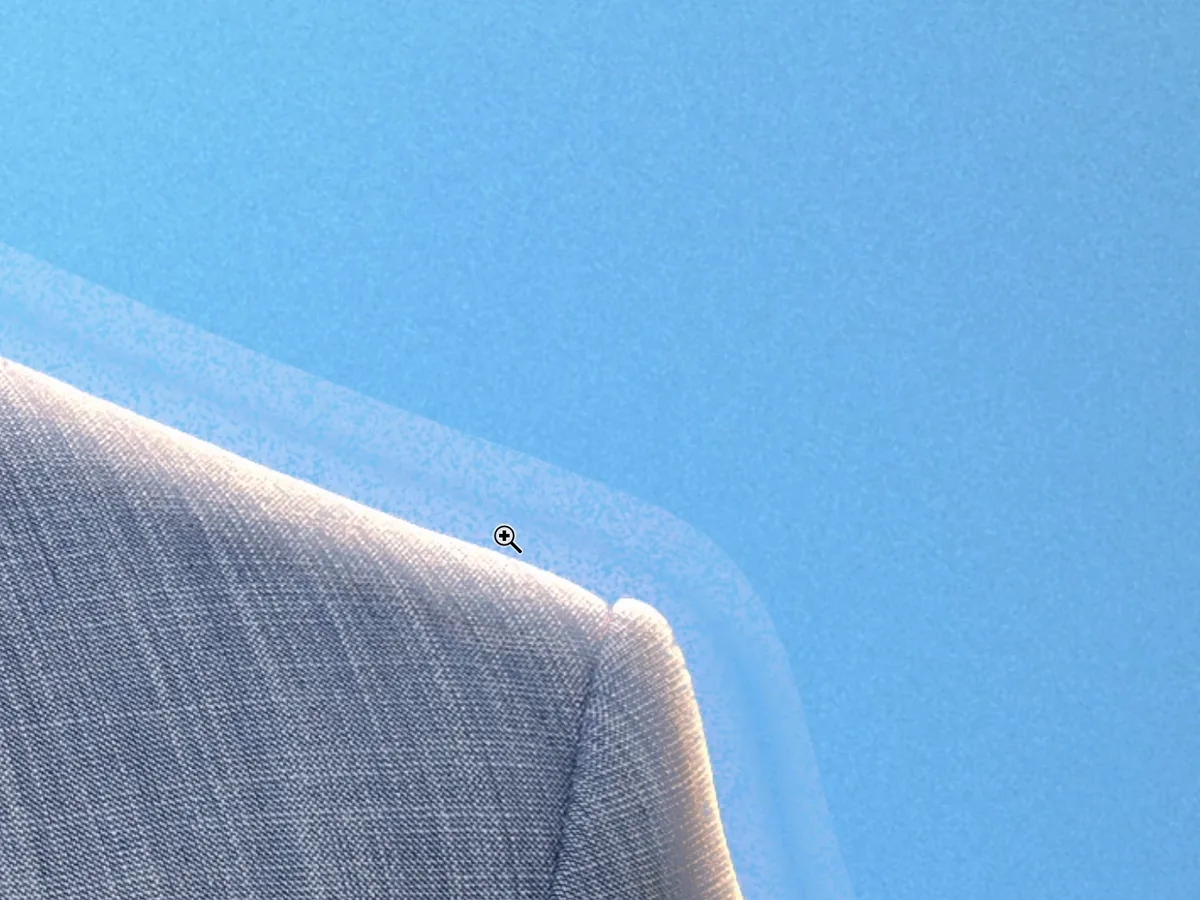
This is why I apply one layer per light. My rim lights left a thin halo round his jacket. On one layer that is hard to fix. With a layer per light it takes a minute: select the rim light's layer, add a mask, and paint black over the halo with the brush at 100% opacity. I did the same on the other rim light. Watch (10:05)
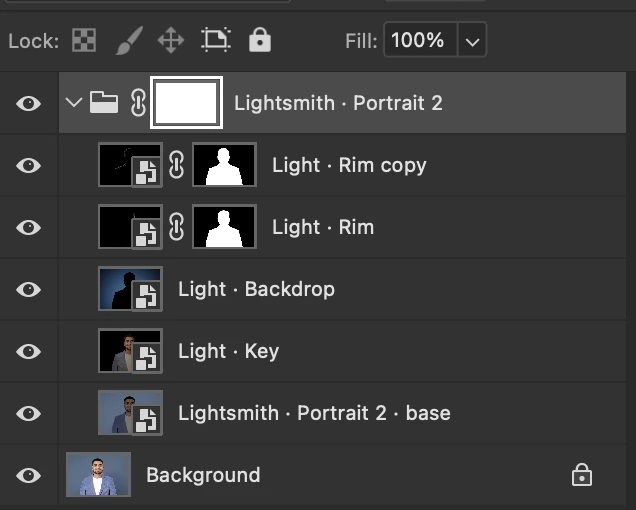
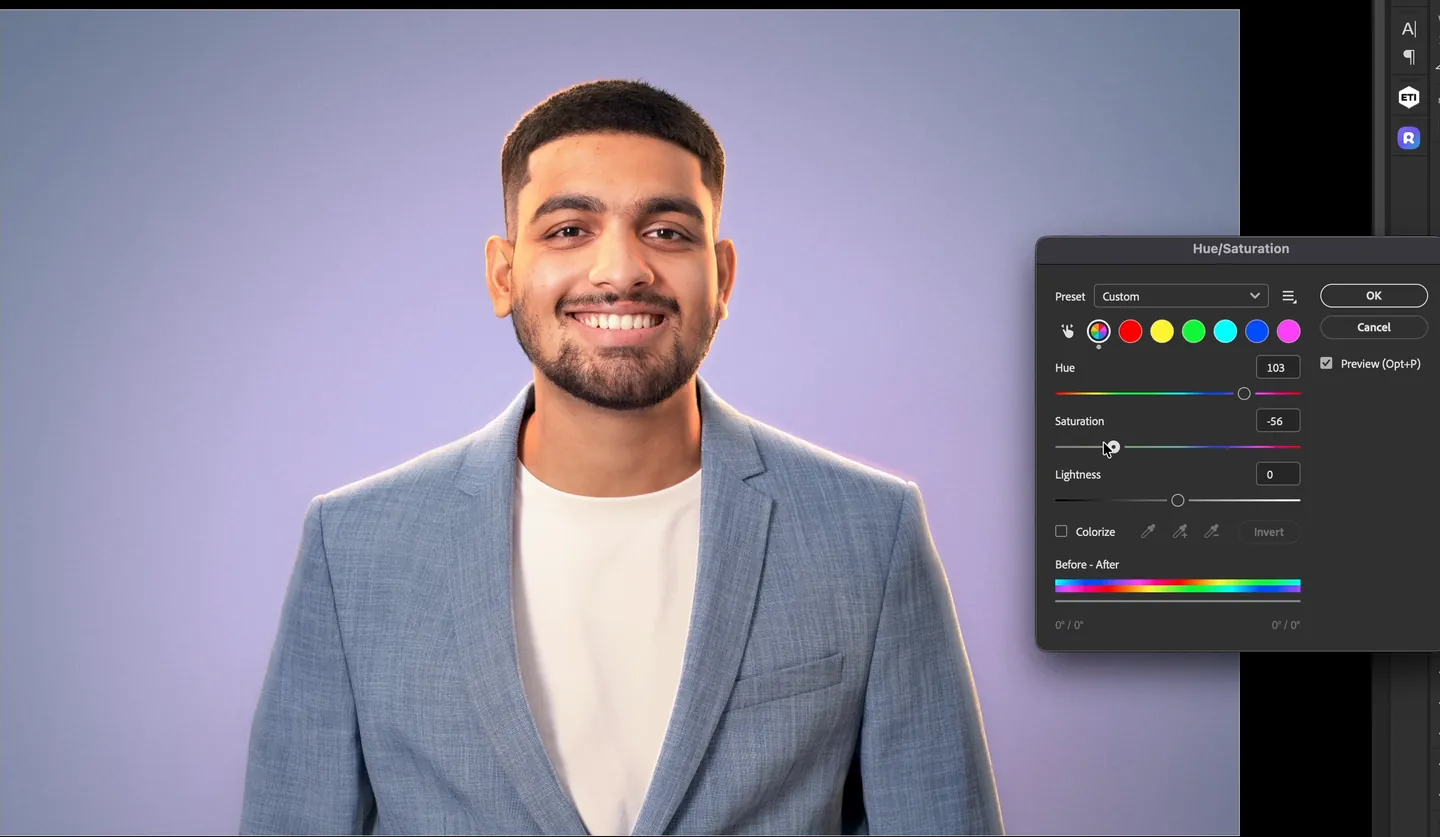
Every light stays editable, too. I selected the backdrop layer, opened Image → Adjustments → Hue/Saturation and changed the colour of the wall. Drag Saturation all the way down and it turns grey.

The second example: a villa from day to night
Lightsmith reads a photo before it lights it, so on a building it knows this is not a portrait. It switched to setups for exteriors: Golden hour, Blue hour, Lights on, Night, Bright sun and Moonlight. Watch (12:29)
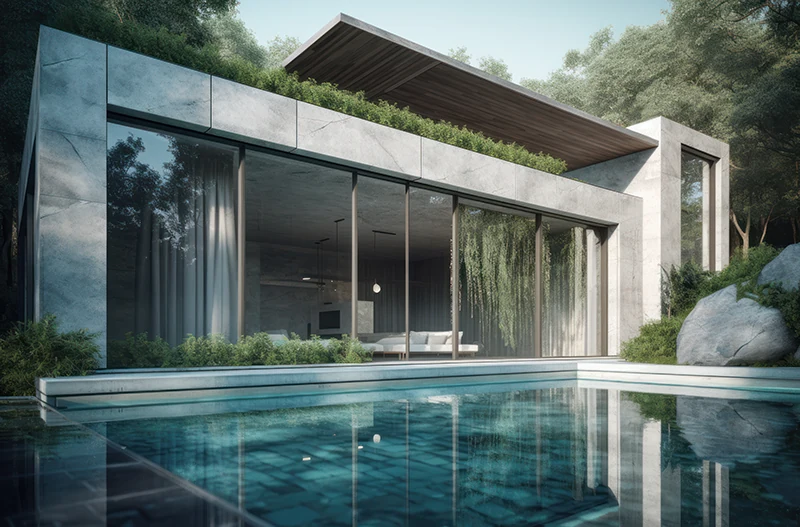
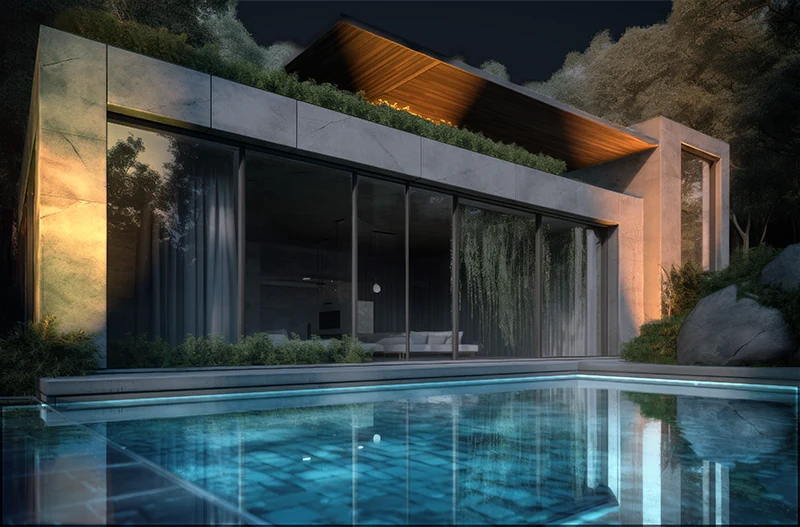 DayNight
Drag the handle. The same photo, relit in Lightsmith and applied as one layer.
Three things I did on this one:
- The pool reflects my lights. I aimed a warm spot with a grid at the wall, and its light showed up in the water's reflection.
- A Glow light lit only the water. Set its Lights up to Pool and the pool glows from inside, in any colour you like.
- Lights went behind things. Pushed back, a light sits behind the plants and the stones and lights the wall and the trees.
The full walk-through is in how to turn a photo from day to night in Photoshop.
Tips for better relighting
- Start from a setup. Changing a good starting point is quicker than building from nothing.
- Choose Subject or Backdrop. Most lights look better on one of the two than on both.
- Warm against cool. A cool key with warm rim lights, or the other way round, gives a portrait depth.
- Compare as you go. Hold B to see the original, or use the Split view.
- Apply one per light whenever you might want to change something later.
Every control is explained in the Lightsmith guide, and the rim lights get their own post: how to add rim light in Photoshop. For a new Radbin tutorial every week, subscribe on YouTube.
Relight your own photos inside Photoshop
Lightsmith is on Radbin's Enhance tab, next to 13 other tools and eleven image models. Trying lights is free, and a result costs 2 credits.
Watch Radbin on YouTube
Real tests and tutorials, all inside Photoshop. See the whole channel.
 20:03Nano Banana 2.1 vs GPT Image 2 and FLUX 3: ten tests
 14:31Photoshop Relight vs Radbin Lightsmith
 10:24Retouch skin without losing the texture
 9:28Every Radbin tool in 9 minutes
 9:50Fix the focus of any photo after it was taken
 1:43Radbin changes only what you ask