 Radbin
Real estate photographers call this a virtual twilight, or day to dusk: a photo taken by day, edited to look like evening with the lights on. By hand in Photoshop it is slow work. You darken and grade the photo, replace the sky, and paint every light in, one by one. In Lightsmith, the light studio in my Radbin plugin, you place lights on the photo and it works out where they fall, even in the water.
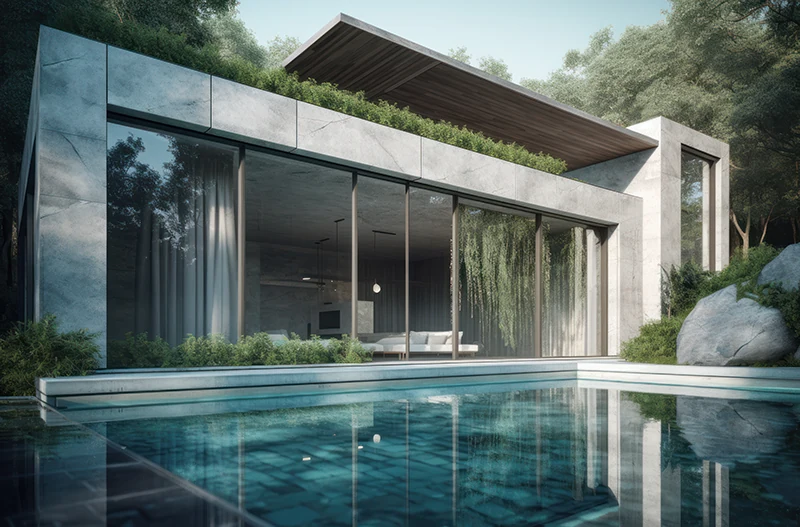
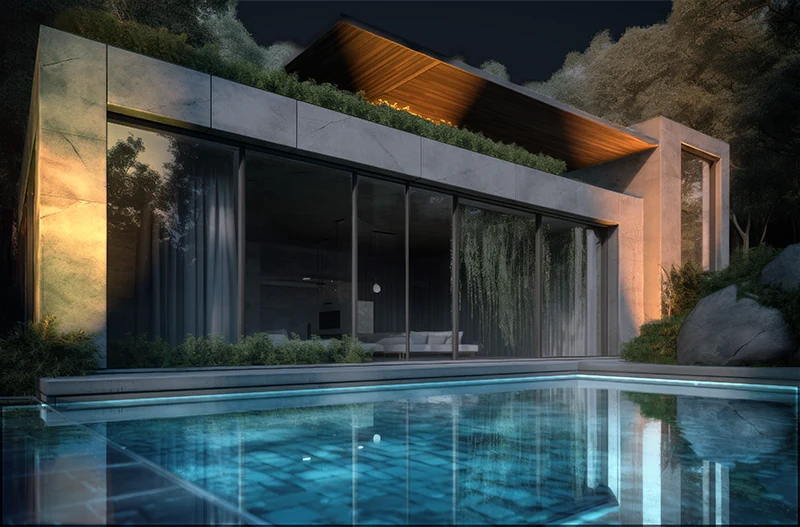 DayNight
Drag the handle. The same photo, relit in Lightsmith and applied as one layer.
What you need: Photoshop 2025 (26.0) or newer on a Mac or a Windows PC, and the Radbin plugin. Lightsmith is on Radbin's Enhance tab. Trying lights is free; applying a result costs 2 credits.
Step 1: Let Lightsmith read the photo
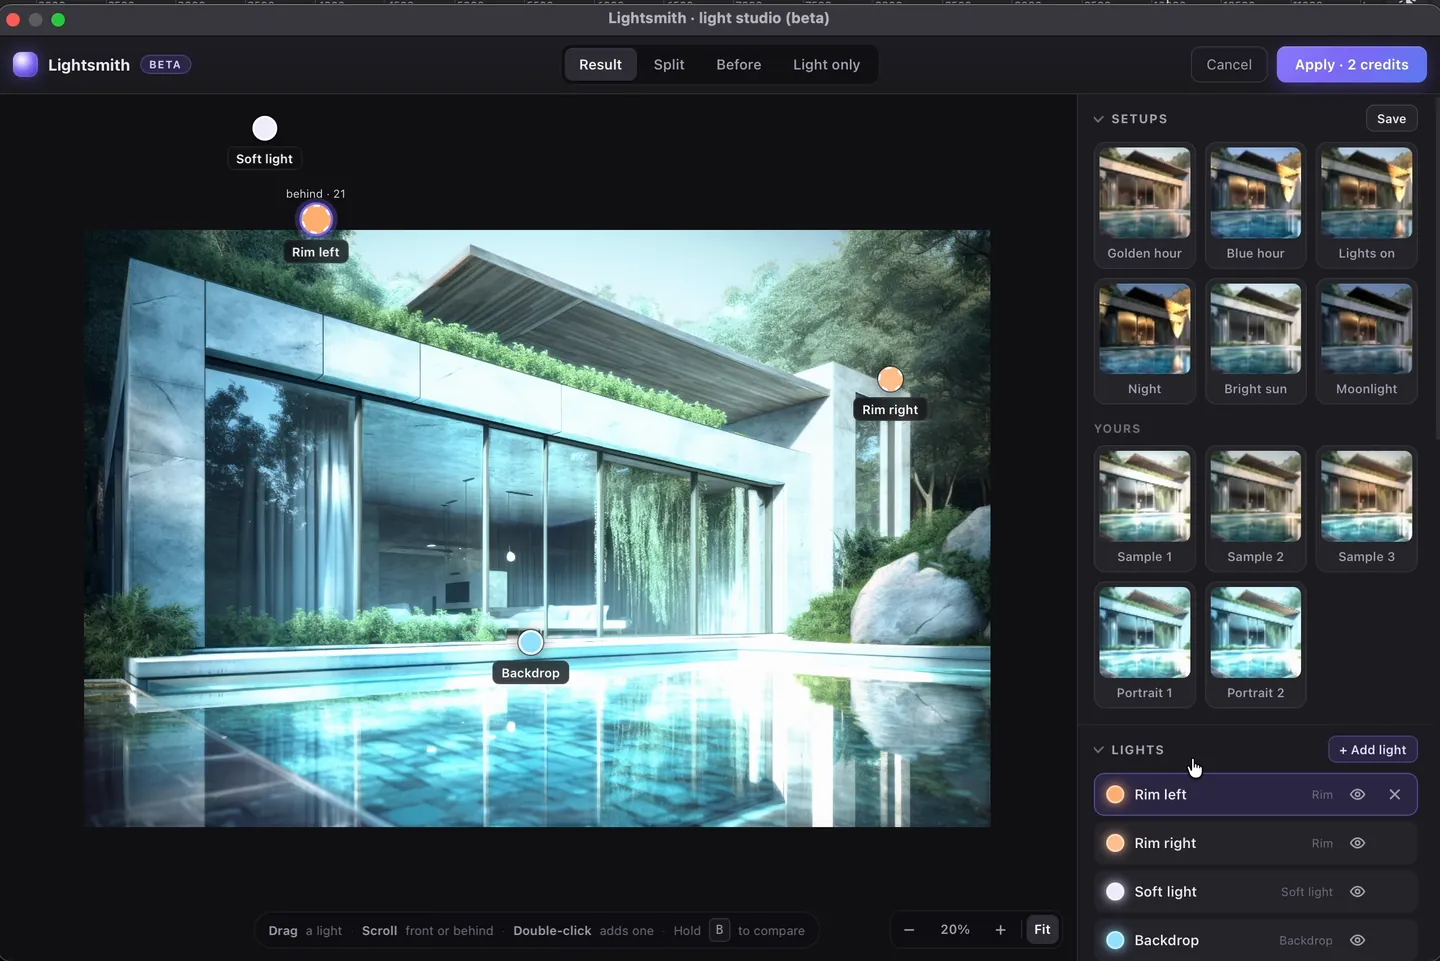
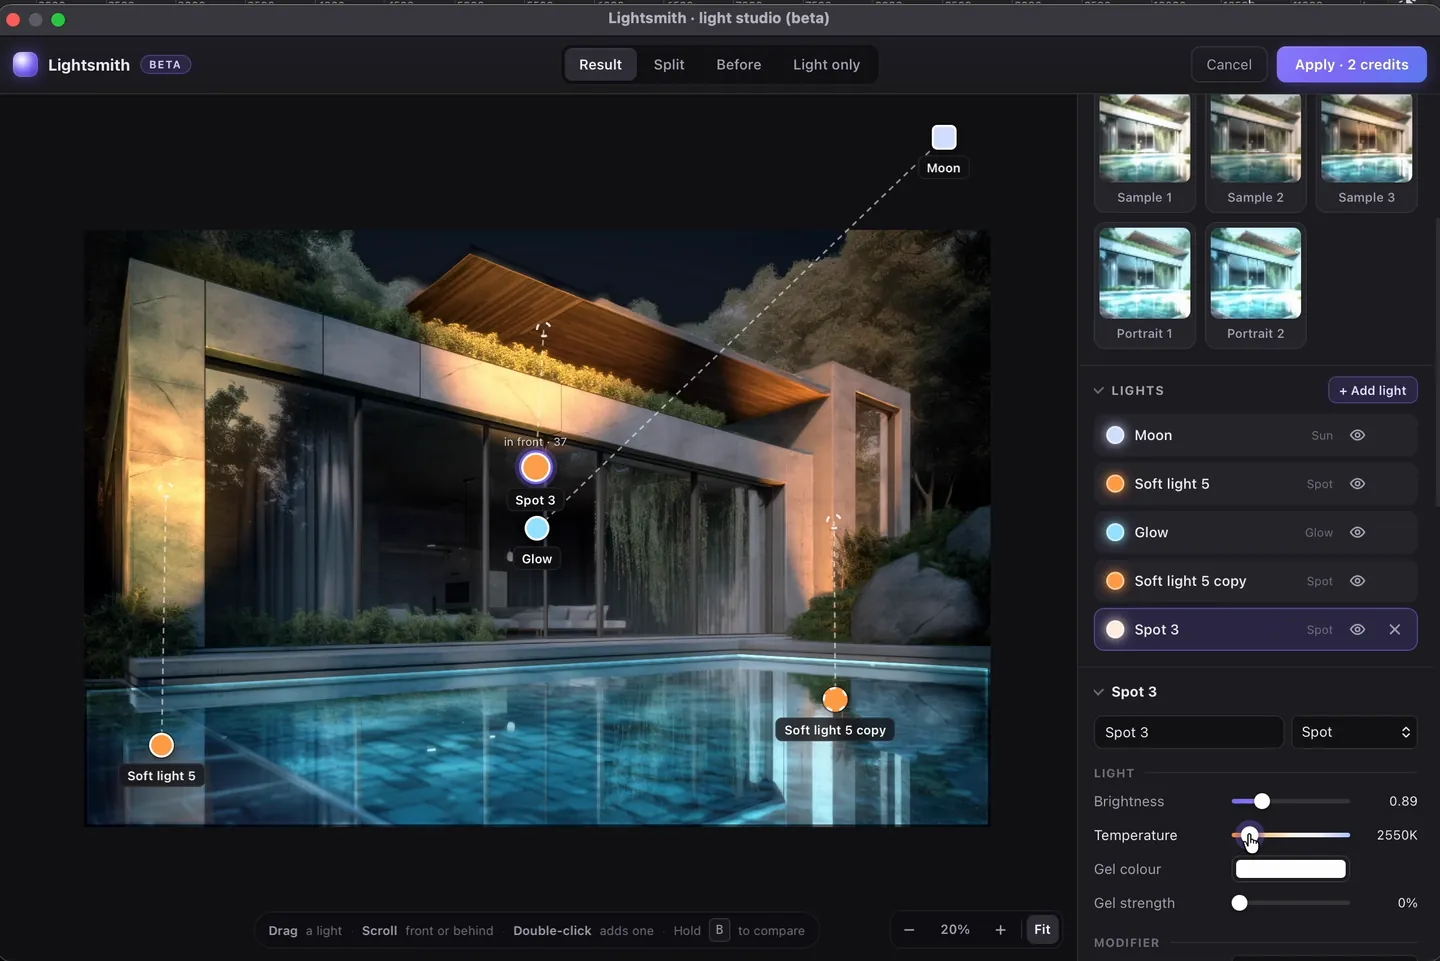
Open the photo in Photoshop, then in Radbin go to Enhance → Lightsmith → Open the studio. It reads the photo first and knows this is an exterior, not a portrait. The setups change to ones for buildings, gardens and landscapes. If it ever guesses wrong, set Photo to Exterior under Scene. Watch this step (12:29)
If you used Lightsmith before, it opens with your last lights. Remove them, or turn them off with the eye next to each one.
Step 2: Try the exterior setups
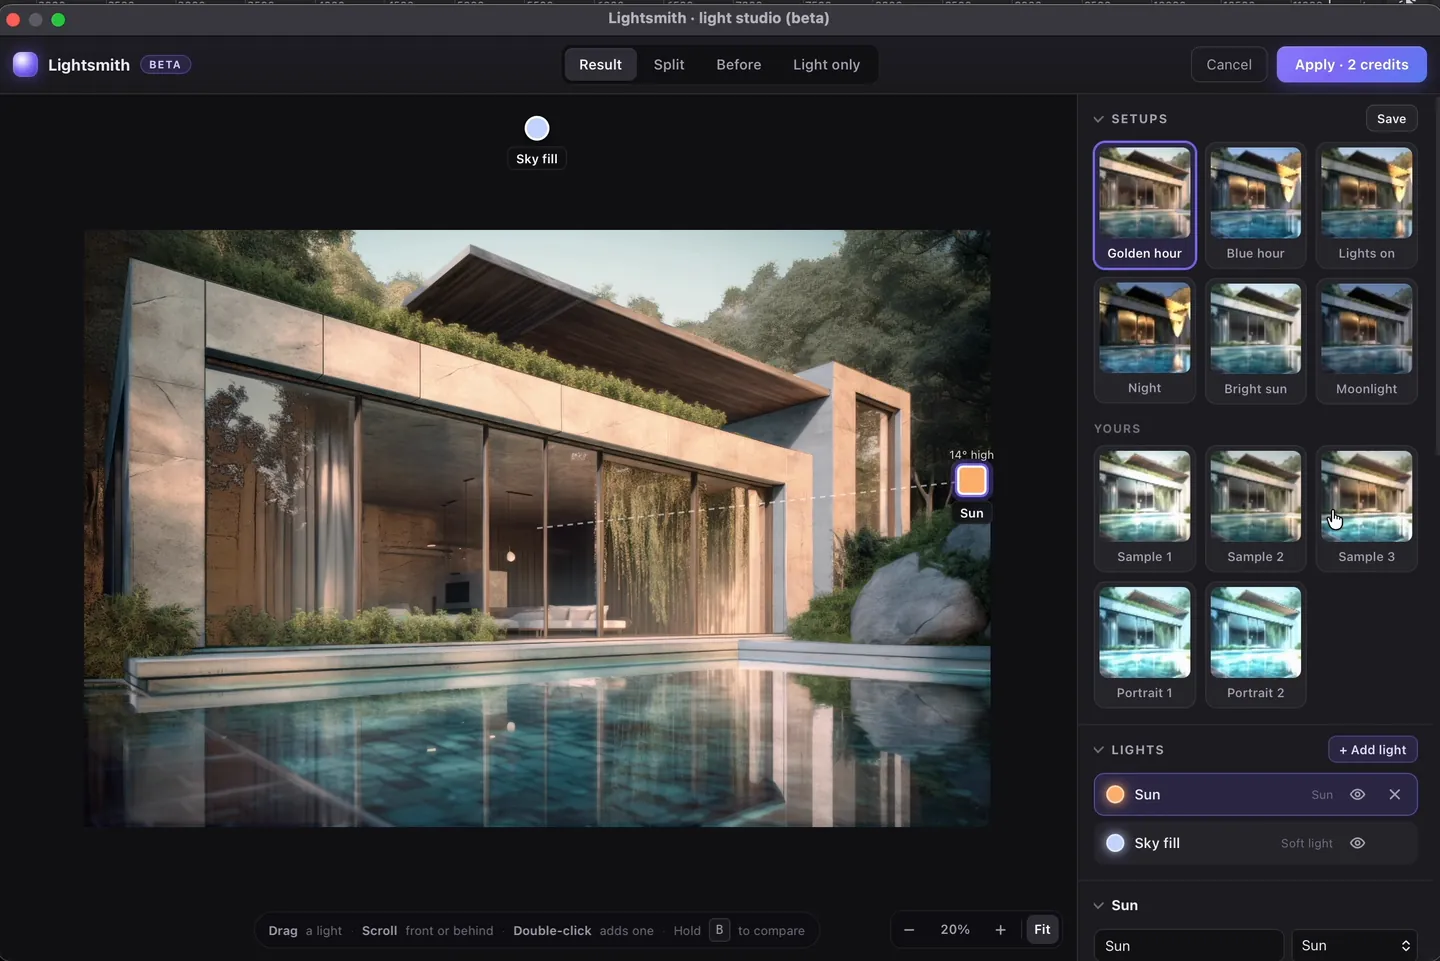
You get six: Golden hour, Blue hour, Lights on, Night, Bright sun and Moonlight. Night and Moonlight also switch on lamps inside the house, behind the glass, so the rooms glow through the windows. Pick one as a start. I tried Golden hour and Moonlight before I built my own. Watch (13:18)
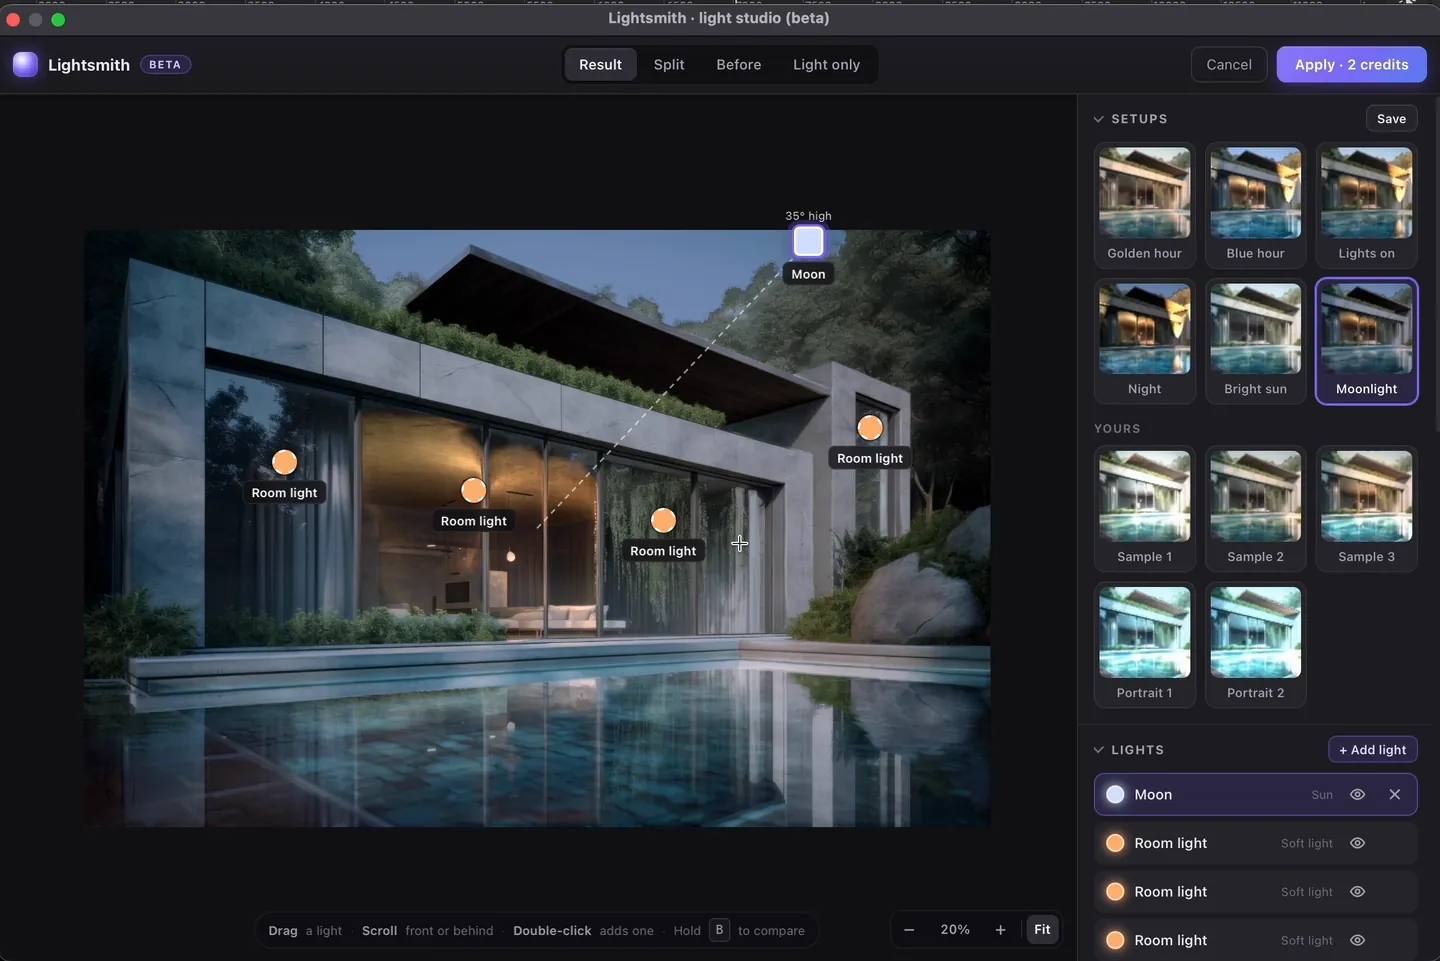
Step 3: Light the wall with a spot
Click Add light → Soft light, then set Modifier to Grid. The light becomes a narrow spot you can aim. Make it small, raise the brightness, and warm it right up. Then aim it at the wall. Watch (13:54)
Now look at the pool. The water reflects the lit wall, because Lightsmith knows where the water is and what it mirrors. Move the light, and the reflection follows.
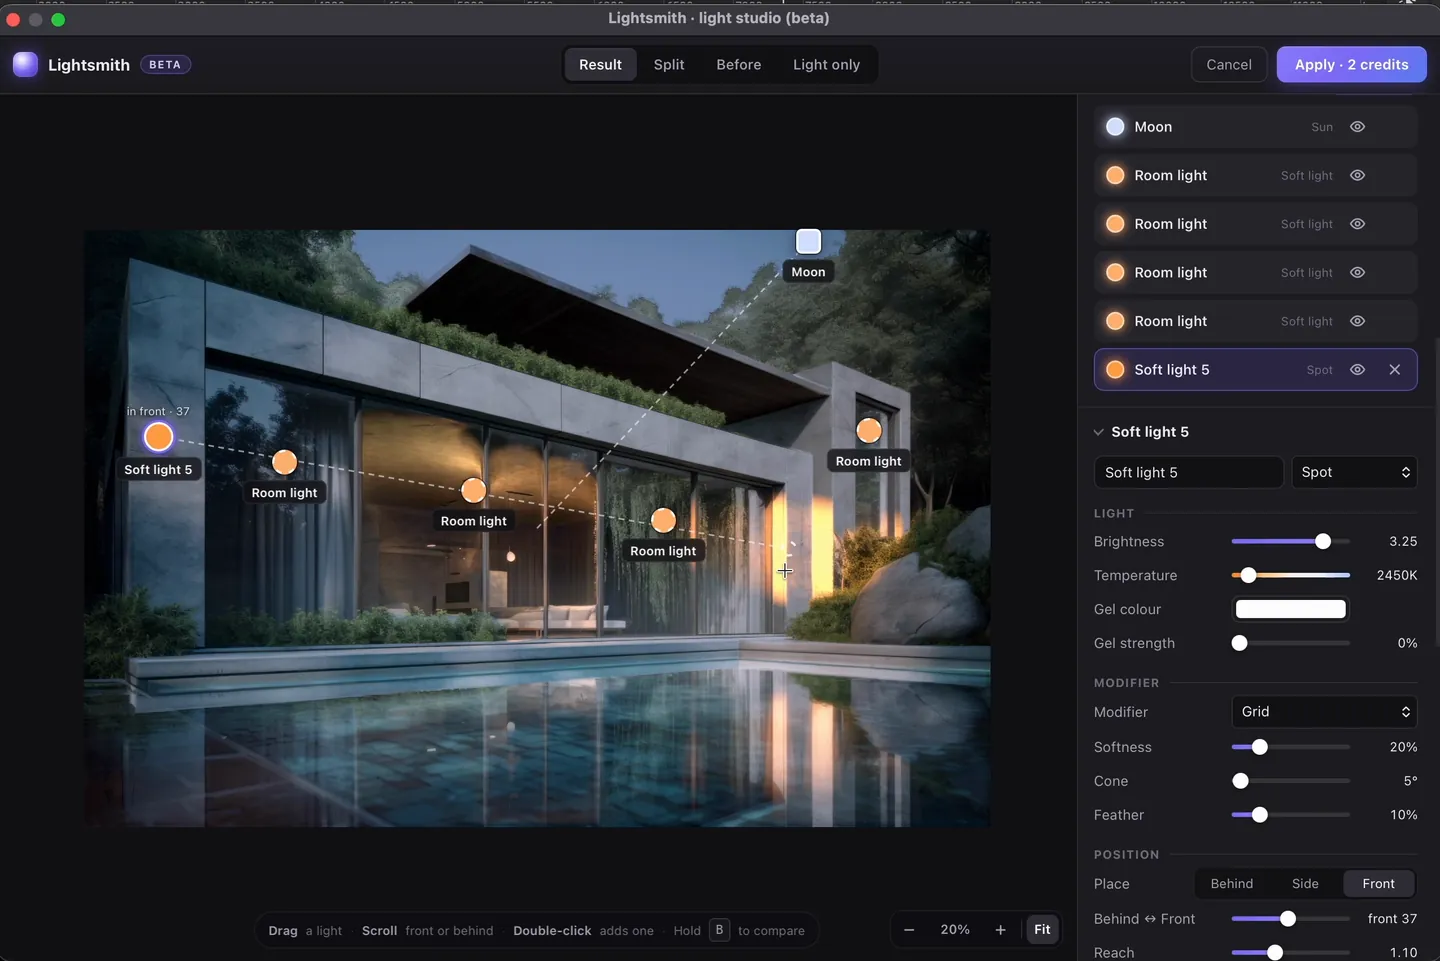
Step 4: Make the pool glow
Click Add light → Glow. A glow lights things from within: windows, a pool or lamps. It picked the windows first, so under Lights up I chose Pool, and the pool lit up from inside. The yellow didn't suit the water, so I made it light blue. It lights only the water. Watch (15:19)
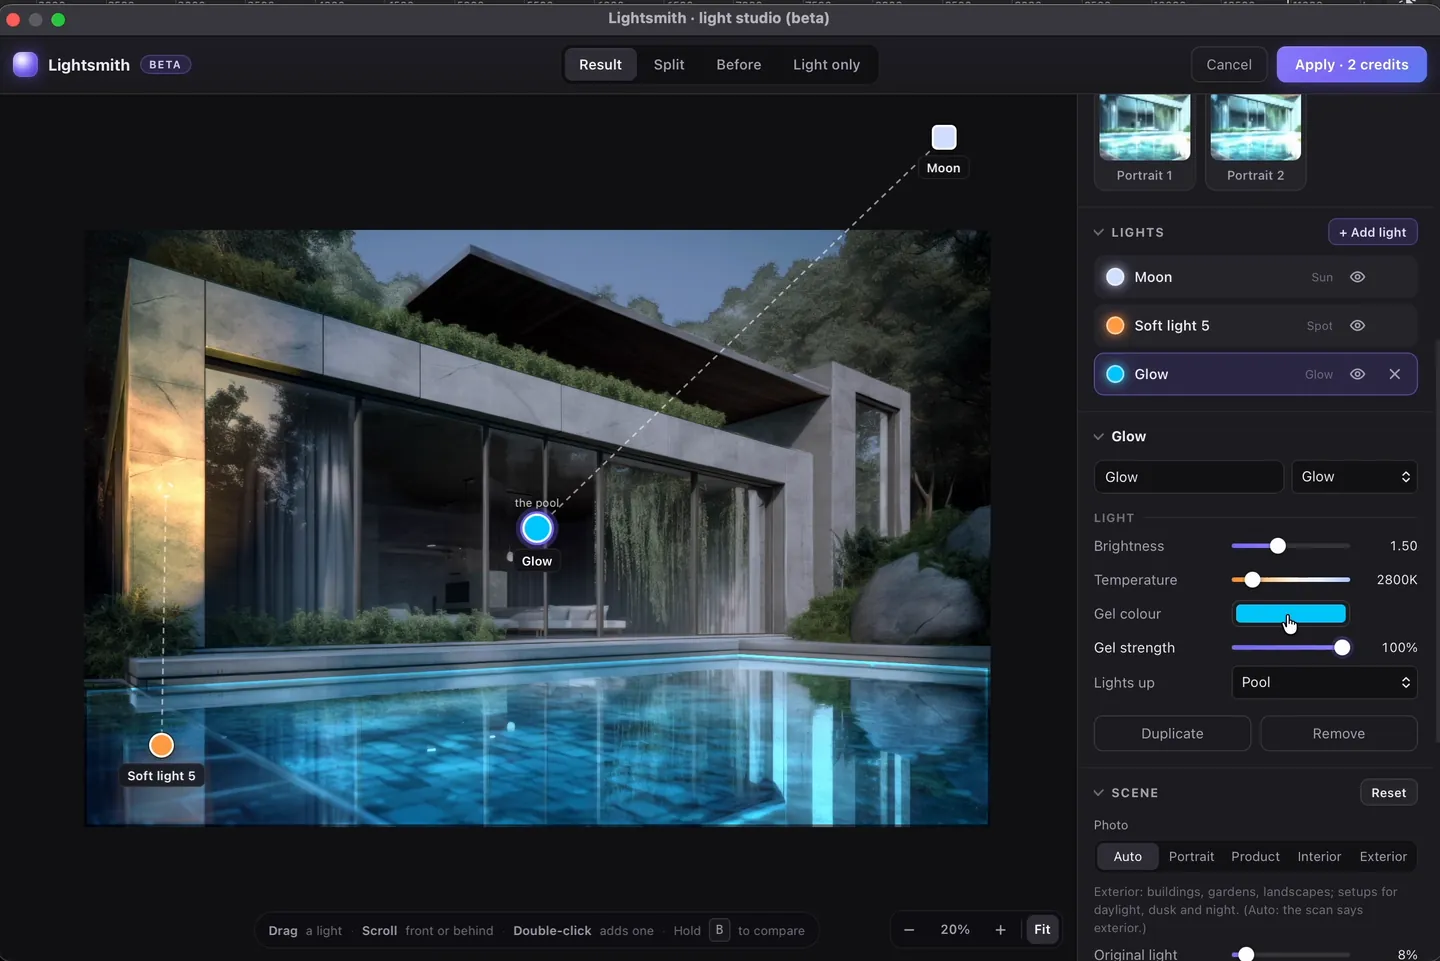
Step 5: Darken the sky
A night photo is mostly dark. Under Scene, lower Sky to darken the sky, and use Sky colour to tint it towards dusk blue or gold. Original light takes down the daylight on the building. I also turned the moon light down a little. Watch (16:09)
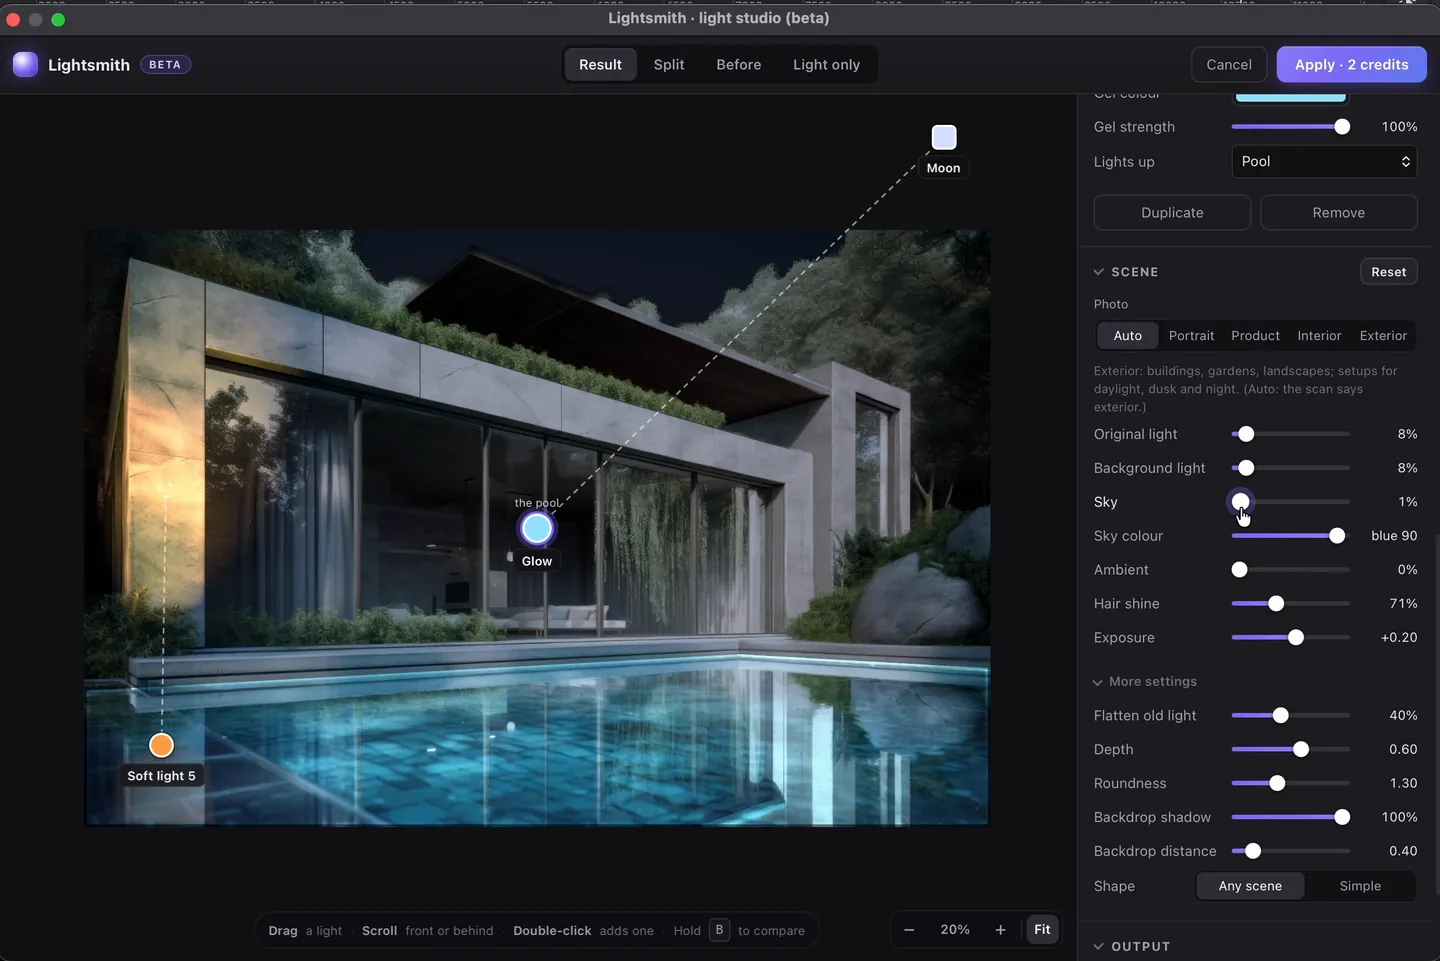
Step 6: Put lights behind the plants
I duplicated the wall light and moved it to the right. It was too far in front, so I pushed it back with the Behind ↔ Front slider. Now it sits behind the plants and the stones and lights the wall and the trees, not the bushes in front. One more warm Spot, also pushed back, lit another part of the wall. Watch (16:50)
Step 7: Apply
Click Apply and choose One layer or One per light. I used one layer, and it costs 2 credits. Look at the reflections of the lights and the building in the water, and at the detail. It is still your photo; only the light changed. See the result (17:32)
Try it on your own exterior: free to try, 2 credits to apply.
Get RadbinTips for a believable night shot
- Darken first, then light. At night most of the scene is dark. Light only what would really be lit.
- Warm lights, cool sky. Warm wall lights against a blue sky read as evening straight away.
- Aim, don't flood. A grid or a snoot washes a wall; a soft light spills onto everything.
- Use depth. Lights pushed behind plants and stones make the scene feel real.
- Keep a few windows lit. Night and Moonlight put lamps in the rooms. A house with every window dark looks empty.
- Want a new sky? Lightsmith darkens and tints the sky you have; it doesn't add clouds or a sunset. For a dramatic sky, run Photoshop's Edit → Sky Replacement first, then relight.
- Selling a property? Label it as a virtual twilight. Rules for edited listing photos differ between listing services, so check yours.
Does it work on interiors and products?
Yes. Rooms get their own setups: Morning light, Bright & airy, Golden sunbeam, Evening lamps, Cinematic night, Gallery spots and Neon night. Products get eight more, from Studio softbox to Colour pop. Portraits get 25; the full tutorial shows one from start to finish.
Watch the whole villa edit in the video:
Relight your own photos inside Photoshop
Lightsmith is on Radbin's Enhance tab, next to 13 other tools and eleven image models. Trying lights is free, and a result costs 2 credits.
Watch Radbin on YouTube
Real tests and tutorials, all inside Photoshop. See the whole channel.
 20:03Nano Banana 2.1 vs GPT Image 2 and FLUX 3: ten tests
 14:31Photoshop Relight vs Radbin Lightsmith
 10:24Retouch skin without losing the texture
 9:28Every Radbin tool in 9 minutes
 9:50Fix the focus of any photo after it was taken
 1:43Radbin changes only what you ask