 Radbin
What is a rim light?
On a set, a rim light (some call it a kicker) stands behind the subject, off to one side, and points back towards them. It lights the edge of the hair, the shoulders and the side of the face, and leaves the front alone. Put one on each side and you outline the whole figure. A warm rim against a cool backdrop is one of the quickest ways to make a portrait look professionally lit.

Method 1: paint it with Color Dodge
This is the classic way, and it works in any version of Photoshop:
- Add a new layer above the photo and set its blend mode to Color Dodge.
- Pick a soft round brush at a low opacity, 5 to 10%, and a warm colour.
- Paint along the edges that would face the light: the hair, the ear, the shoulder. Build it up in a few passes.
- Lower the layer's opacity until it looks natural, and mask anything that spilled onto the background.
The catch: you are drawing the light by hand, edge by edge, and it rarely follows the shape the way a real light does. Move the light, and you paint it all again.
Method 2: place a real rim light with Lightsmith
Lightsmith, the light studio in my Radbin plugin, lights the photo from its depth and shape, so a rim light follows the outline by itself. Watch it in the video (5:08)
- Open the photo, then in Radbin go to Enhance → Lightsmith → Open the studio.
- Click Add light → Rim, or start from the Rim setup, which already has two.
- Drag the light to the side you want. A rim light sits behind the subject; use Place (Behind, Side, Front) or the Behind ↔ Front slider to move it. Everything moves live.
- Turn the Temperature warmer (I used about 3,450 K) and lower the Brightness until the edge glows rather than burns.
- For light on the hair, click Duplicate and move the copy up, above the head and a little to the front.
- Under Output choose One per light, and click Apply (2 credits).


How to remove the halo
A strong rim light can leave a thin bright halo where the subject meets the background, especially round fabric and fine hair. With one layer per light it is a one-minute fix: watch me fix it (10:05).
- In the Layers panel, open the Lightsmith folder and select the rim light's layer.
- Click Add layer mask.
- Take the brush at 100% opacity, set the colour to black, and paint over the halo.
- Do the same on the other rim light's layer if it left one too.
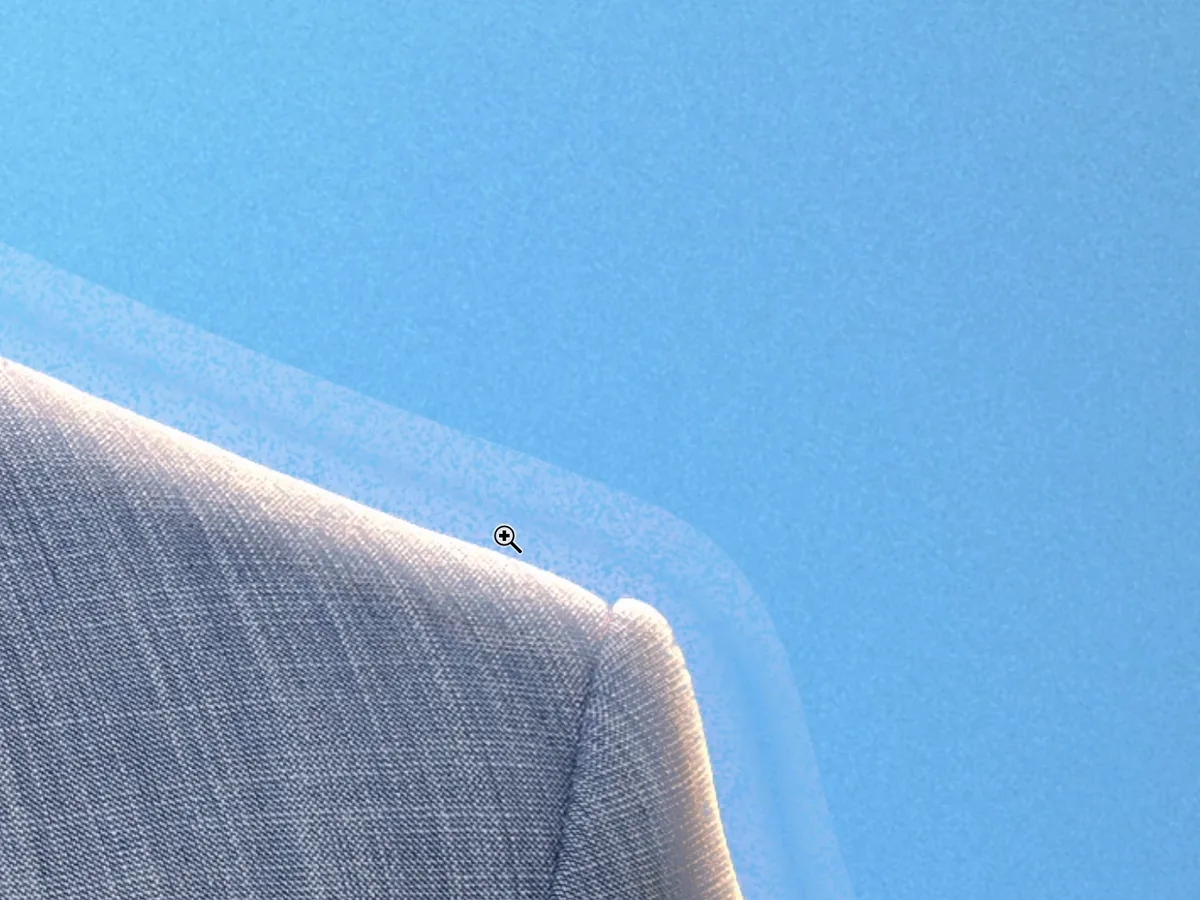
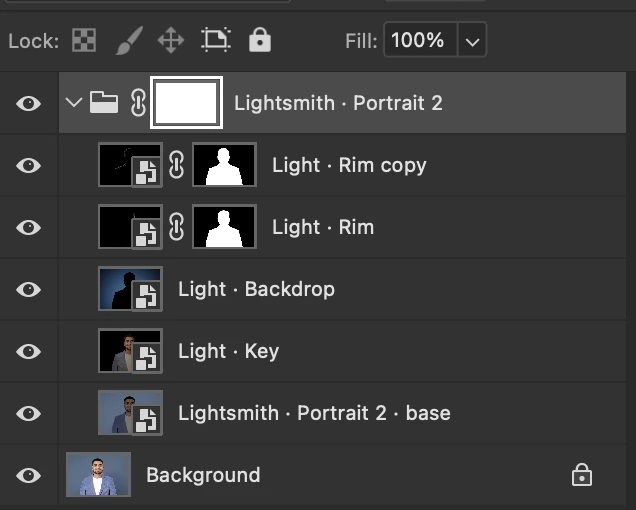
Because each light is on its own layer, you can also change a rim light's colour later with Hue/Saturation, or lower its opacity, without touching the others.

Place rim lights live inside Photoshop: free to try, 2 credits per result.
Get RadbinRim light tips
- Keep it behind. Bring a rim light too far forward and it becomes a side light.
- Warm rim, cool key, or the other way round. The contrast is what makes it read.
- A darker background shows it best. On a bright one, turn down the background light or use Darken backdrop.
- Light the hair separately with a raised copy of the rim.
- Check the edges at 100% before you deliver. A halo you can't see zoomed out shows in print.
These rim lights come from my full tutorial: how to relight any photo in Photoshop. Every Lightsmith control is in the guide.
Relight your own photos inside Photoshop
Lightsmith is on Radbin's Enhance tab, next to 13 other tools and eleven image models. Trying lights is free, and a result costs 2 credits.
Watch Radbin on YouTube
Real tests and tutorials, all inside Photoshop. See the whole channel.
 20:03Nano Banana 2.1 vs GPT Image 2 and FLUX 3: ten tests
 14:31Photoshop Relight vs Radbin Lightsmith
 10:24Retouch skin without losing the texture
 9:28Every Radbin tool in 9 minutes
 9:50Fix the focus of any photo after it was taken
 1:43Radbin changes only what you ask